The bell to start class just rang. Now what? Let’s talk about those classroom openers that go by many names – “bell ringers”, “warm ups”, or “do nows”. After over 35 years in the teaching game, I’ve had my fair share of experiences with these little classroom kickstarters. You could say that bell ringers (or your preferred name) and I have a bit of a “frenemy” relationship. Why? Let me elaborate on the advantages and challenges I’ve experienced with bell ringers throughout my career.
As we head into a new school year, I’ve been thinking about what still works — and what needs a refresh. Bell ringers are one of those things that can either work for you or they can be a challenge. It’s important to know how to use them properly and to realize the purpose.
The Value of Bell Ringers
First things first, let’s acknowledge the credit bell ringers deserve. They can truly elevate your teaching game. Once seamlessly integrated into your daily flow, most students will fall in line. When students enter the room, they dive straight into the bell ringer activity. This gives you some precious moments to tackle all those initial tasks that need attention – like attendance, catching up with absentees, and the never-ending quest for missing assignments.
Wondering how to make this streamlined approach a reality? It’s all about setting the groundwork from day one. Here’s the deal: let your students know that the next time they walk into the classroom, there will be a bell ringer or directions on the board waiting for them, and they should start on it right away. Consistency is key here – when you establish this routine early on, students will come to expect it and know exactly what’s coming their way.
But that’s not all. Having them dive into the bell ringer gets their gears turning. It’s like flipping a switch that says, “Time to learn, folks!” The activity itself helps reel in their focus, and guess what? It prevents those precious minutes from vanishing into thin air. Trust me, math teachers know how to squeeze every ounce of learning time from the clock.
What adds to the charm of bell ringers is their versatility. They can serve specific purposes within your lesson plan. Whether reviewing a topic, accessing material that might otherwise be overlooked, or even acting as a captivating lesson hook – a purpose-driven bell ringer provides valuable insights to educators while aiding students’ comprehension of topics and sparking their interest.
I often used bell ringers to prepare students for upcoming exams such as in-school ACT, SAT, or state tests. Additionally, I found value in conducting reviews of past topics and addressing areas where I knew many students have learning gaps.
Let’s Talk Challenges Now
It’s important to know that bell ringers don’t always go as planned. One big issue is treating them as just something to pass the time. If students think they’re not important, they might not take them seriously. Have you ever had a student ask, “Does this count for a grade?” That’s their way of saying, “I’ll only do it if it matters.” So, the trick is to make sure they have a clear purpose. Even if grades aren’t involved, helping students understand how the bell ringer helps their learning is key. It is also important that students know that once they are finished with the bell ringer, there’s a good chance that someone in the room will have to explain how to work the problem or even go to the board and work it. If students feel like they might get called on, they will not want to get caught off guard.
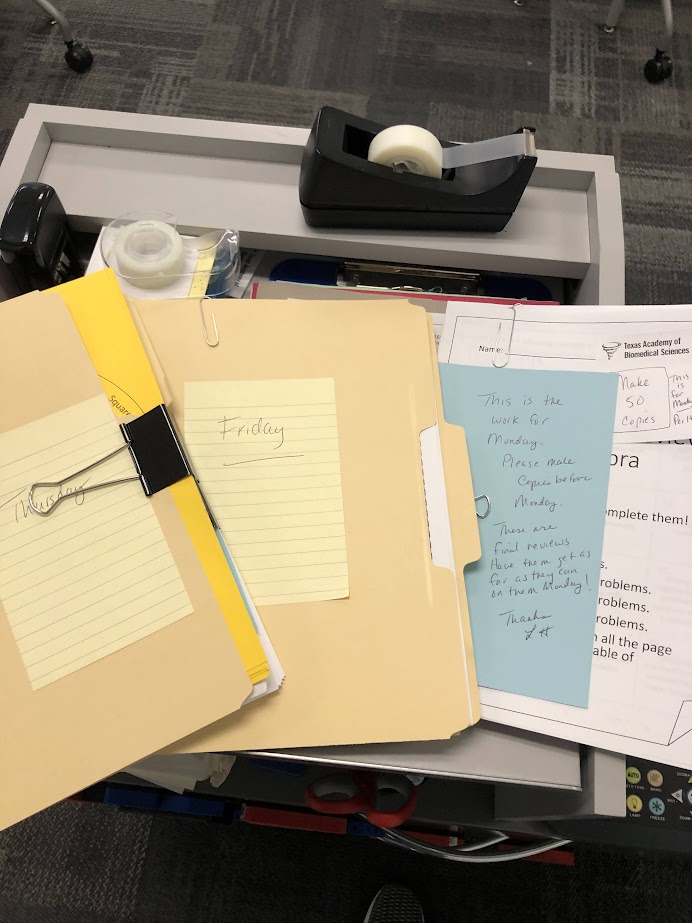
There were times when I was in a pinch and had to create a bell ringer on the fly, without much preparation. It’s no secret that students can sense when things are a bit disorganized. You see, the whole “Fake it until you make it” idea doesn’t work well in teaching. You can’t pretend to be organized. With a classroom full of around 28 students, there’s just too much happening. You’ve got to be on your A-game. Teaching requires real organization and being genuinely ready for what’s ahead. So, take it from someone who’s been through it – staying organized is a true game-changer and that applies to having a prepared bell ringer.
There have been times when I decided to stop doing bell ringers altogether, or at least in some classes. During remote learning, my bell ringers didn’t translate well online, so I paused them for a while. The important thing is, it’s okay to change things up when needed.
Transitioning from one activity to another can make or break the classroom atmosphere. There were years when after the bell ringer, things got a bit crazy until I could get things back on track. Realizing the importance of fewer disruptions in certain classes, I chose to skip bell ringers to stay focused and keep my sanity intact. By the way, transitions can be smooth. If you give clear directions on what to do next and even set a timer, they can go better.
The biggest reason that I have a love-hate relationship with bell ringers is the significant time investment required to either source or craft them. It can feel counterintuitive to dedicate an hour to creating something that’s intended to occupy just around 10 minutes or less of valuable class time.
Purpose Matters
If you’re set on doing bell ringers, give them a purpose. Before going any further on your quest for bell ringers, stop and write the purpose the bell ringer will serve. Here are some suggestions:
- It will be a hook for the lesson.
- It will be a digital task.
- It will be a review of the previous day.
- It will be state testing review.
- It will be college readiness review.
- It will be spiral review.
- It will be a writing task.
- It will be a seasonal math task.
Once you lock in that purpose, you can hunt down the material. You need to think about how much time you want to spend on the bell ringer in class. That will help determine how many questions you want to have. I’ve listed some ways to come up with the problems:
- Search real-life examples so the problems have meaning.
- Use Desmos activities and spread them out over a week.
- Write questions that are similar to the homework.
- Use released test questions from your state tests or from college entrance exams.
- Grab problems out of the math book at the end of units for spiral reviews.
- Use AI generated questions. Beware! AI is not always great with math.
Now that you know your purpose and where your material is coming from, what format do you want to use? I’ve done different things, but one of my favorites is a three question approach where the first two questions scaffold for the third question. I’ve used this format in my ACT Bell Ringers as well as my SAT Bell Ringers. Day 26 from the SAT Bell Ringers is seen below:
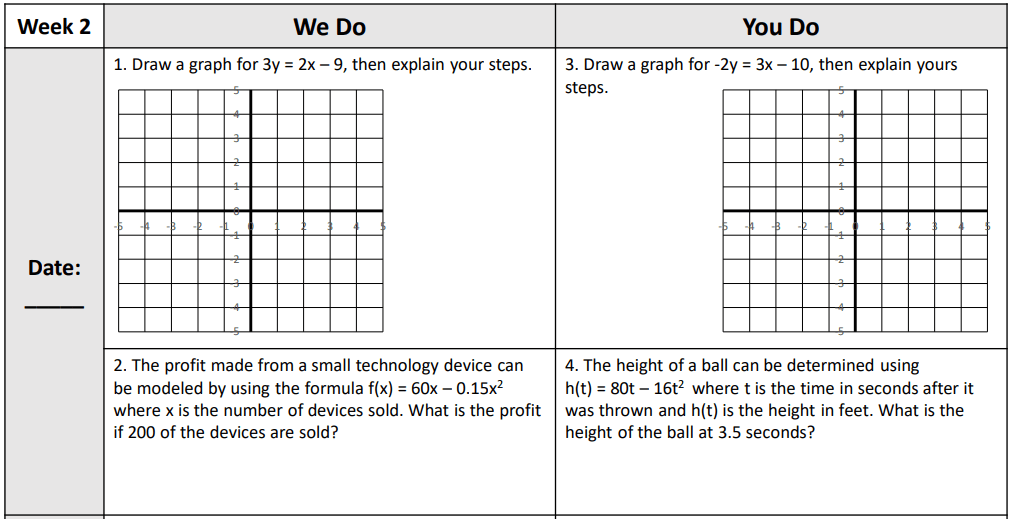
Another option is “We Do, You Do”. Together with the class, the teacher works through 1 and 2 and then lets the students work by themselves on 3 and 4. In this format, the teacher will begin class working the problems. When students work the other two, she can go do her attendance and other tasks. This approach is good when you have students that have a hard time starting. The example below is from my Algebra Review Bell Ringers.
Recently, I’ve been developing a new style of bell ringers designed with differentiation in mind. Instead of every student working through the same set of problems, this format allows students to choose from multiple levels of challenge based on their confidence and readiness that day.
This approach keeps all learners engaged—whether they need a little extra support or are ready to stretch their thinking. It also builds student independence, since they’re making decisions about how to approach the task. These differentiated bell ringers aren’t uploaded just yet, but they’re on the way. I’m excited to share them soon!
Your Bell Ringer Investment
Most of us do not want to spend our precious teacher planning period on bell ringers, so we end up working on it at home. If you decide to create these bell ringers yourself, then by all means save them so you have them for the next year. Make your time investment work for you in the future.
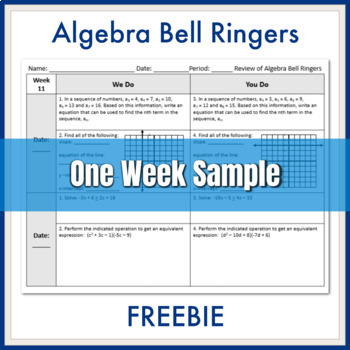
If you decide that recreating the wheel is not for you, then you can look at what I have. I’ve bundled up my most-used bell ringers from over the years to save others some prep time. Whether it’s Geometry, Algebra, or even a sprinkle of Trig, there’s plenty of things to choose from. Check out the resource after the final paragraph. You can look at the individual items and purchase them separately too.
In closing, the journey with bell ringers is an exploration of balancing their benefits and challenges. As educators, we adapt and refine our approach, always seeking the best ways to engage our students. Whether you’re harnessing the power of purpose-driven bell ringers, navigating their quirks, or even deciding to take a break when necessary, remember that your dedication to creating a meaningful learning experience remains at the heart of it all. With purpose as your guide, you’re well on your way to transforming those initial moments into impactful stepping stones towards an enriched classroom experience. Keep up the incredible work, and keep those bell ringers ringing with purpose!
If you like what you see, then share it!