When you think of college entrance exams, I’m sure the SAT, PSAT and ACT come to mind. More high schools are offering these tests during school. Some students will take these tests 2 or 3 times or more. Why? Because they need a certain score to gain entrance into a school or to apply for a scholarship. The PSAT is a nice warm up to help students know where they stand before they take the real thing.
Every October, schools offer the PSAT/NMSQT to their juniors. Although sophomores can also take it , only the junior scores count toward the National Merit Scholarship competition. Schools are also starting to offer the PSAT 8/9 (for 8th and 9th graders) and PSAT 10 (this is the regular PSAT, but does not qualify for the National Merit Scholarship competition).
It’s good that schools are offering these tests to their students so they can see the format of this test and the way questions are asked. The SAT is a very important test for students planning on going to college. Colleges use the SAT (and/or ACT) to make admission decisions which makes these tests very important for students that want to go to a certain school.
The ACT is another college entrance exam. Some schools are offering this test during the school year to their juniors. The ACT is different and has a science section where the SAT does not. Again, this test requires practice and there is no pre-test like the SAT.
There are a couple of more tests worth mentioning. Nowadays, colleges want students to take a college readiness test to see if students have the skills to start taking college courses. The ACCUPLACER is used by many states. Texas has their own college readiness test called the TSI. Both the ACCUPLACER and TSI are similar. Students scores will determine if they are able to start their English and Math courses on level or if they will need to take some remedial classes first. The ACCUPLACER and the TSI can be taken as early as the 9th grade and in some cases, earlier. Early College High Schools have their students take the college ready tests the summer before their 9th grade year to give them plenty of time to retake them until they pass.
I’ve been teaching high school math for 30+ years, and it was not until I became a teacher at an Early College High School that I became fully aware of all the tests students take. I realized that I needed to be the one to help them get to where they need to be. I know how important it is for high school teachers to help incorporate college entrance and college readiness practice into their curriculum, especially math teachers. I’ve spent a lot of time creating many resources to do just this.
Below, you will find links that will take you to my Teachers Pay Teachers Store where I sell these resources. There are many options, but the option that I recommend if you are planning on doing a ton of review is the Math Test Prep Bundle for College Entrance. It contains the SAT Bundle, ACT Bundle and a TSI/ACCUPLACER Bundle that you see below:
College Readiness and College Entrance Exam Bundle
ACT Math Prep
3 Reviews – 86 Questions
SAT/PSAT Math Prep
6 Reviews – Worksheets, Bellringers and a 5 Week PSAT Plan.
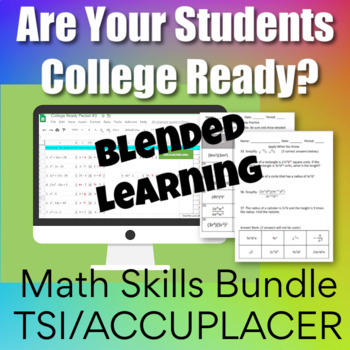
TSI/ACCUPLACER Math Prep
7 Reviews!
I’ve recently started a digital version of the TSI/ACCUPLACER College Readiness Bundle (this is the exact same, but for a digital classroom setting). It is incomplete, but will be finished by the start of the next school year.
It is so important that math teachers take the time to prepare students for their future. Start making a plan now on how to meet the needs of your students. We all have different situations, but I’m sure you can find a way to include study material that will increase your students’ chances of success on college entrance exams and college readiness exams. Good Luck!
Many teachers are in the same boat. You might be thinking…I do a few things online with my students, but not much. If the extent of your online teaching/learning has been Kahoot or Quizlet, then good job! That’s a start. Don’t be ashamed. If you have dabbled in Google Classroom, then Yay! The key is not to be afraid to try new things. There’s always a learning curve, no doubt about it. The more you become familiar with something, then the easier it will be. The key is to start!
So how will you reach your students? Your district is probably scrambling to come up with a plan. I know my district has been having internet issues… as in a virus attacked our whole system. Google Classroom was being used by most of our teachers, but when the district internet and website when down, we couldn’t access Google Classroom. Luckily I was using Blogger. If you’d like to read more about how I use Blogger, then go here: Using Blogger for Online Teaching. I love Blogger because I do not have to rely on my district for anything which is a blessing!
I think it is important to find something you feel comfortable with and something that is free! If you already use Remind with your students, this would be another way to guide them to where you want them to go. If you’ve never used Remind, then check it out here: REMIND. It is not a website, but it is a way to communicate with your students, so let’s say you wanted your students to go to a video, or go do an online activity, you could tell them through Remind!
Once you know how to stay in contact with your students, it’s time to figure out what activities to give them. The reason I love Blogger is because I can use a picture of my resources and place them on my blogspot. How do I check to see if they did it? I’m planning on checking their journal at some point. Right now with COVID-19, I don’t know if we will go back to school anytime soon, so the next thing I gave them was a Quizziz.com activity to see if they understand this material. I love this platform because I can look at the report to see if they did it, how many times they attempted it and how well they did. I stick with these free online tools to check for understanding as well as to teach:
Google Slides – like PowerPoint (use with your google account…if you have gmail, you have google slides)
Google Forms – Good for assessment (if you have gmail, you have google forms)
Hyperdocs – A way to deliver your lessons and provide links to online tools. This site has several templates and tutorials.
Flip Grid – Video Tool (students explain a concept on a short video)
Desmos – Graphing Calculator Tool with Free Lessons – There are two places you will want to use: Free Calculator and Teacher Resources
Screencast-O-Matic – Video your computer screen while you are explaining.
My suggestion is not to overwhelm yourself or your students. Pick a couple of resources that you feel are best for you and stick with them for a while. Ask other teachers in your school what they are using. Get with teachers in your department and share the workload. Some other tools you should check out are Google Meets and Zoom. These are video conferencing tools where you can actually see your students live.
I wish you the best in your online teaching journey. You can do this! If you have any questions, please feel free to comment below. Good Luck!
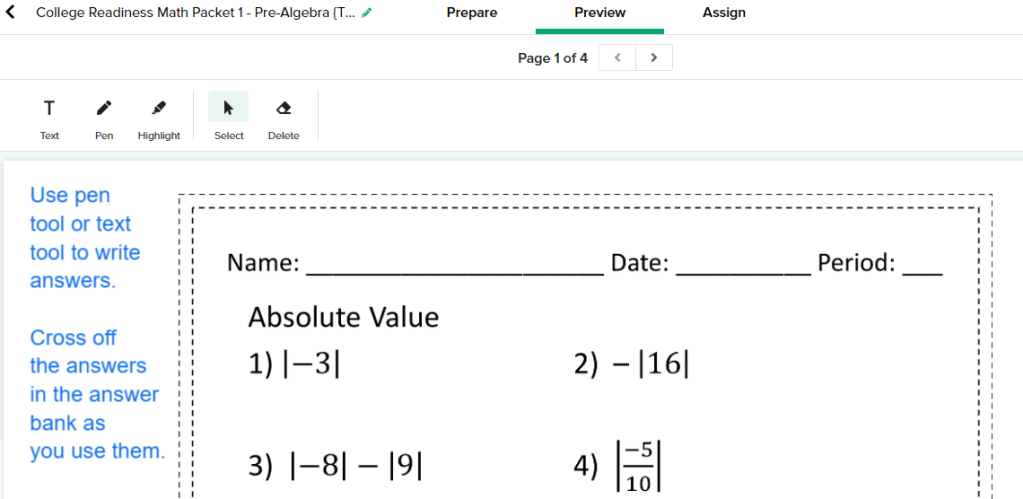
***New on Teachers Pays Teachers! If you purchase a PDF, then that resource might be eligible to use digitally. Look to the right of the product page and if you see “Create Digital Activity” button, then you have access to a digital resource!
Looks like this on the product page after your purchase:
Here’s what it looks like when you are preparing it to be assigned. You can change things as you see fit.
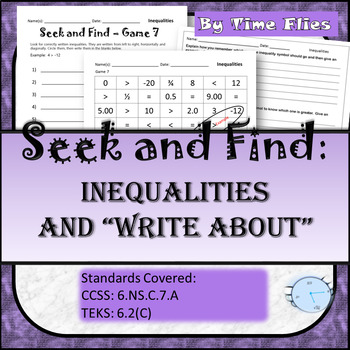
More of my favorite activities that can be used digitally:
I’ve thought many times about writing about how I use Blogger for my classroom. With the coronavirus outbreak, it seems like a perfect time to do this. Like many of you, my district has called off classes for two weeks and who knows if it will go longer. I will still be able to give my students the things they need through Blogger. I’m really grateful that I started using this free platform.
I’ve been on spring break for a week. The week before spring break, we lost our school internet and the school website and all of the systems that we use. I’m in a huge district, so how could this happen? I still was able to use many of my tools because my campus has a second internet since we are connected to a college campus. I was still able to use my Blogspot! I started using Google Classroom at the beginning of the year to see what all of the fuss was about and I found it too restricting. I have too many things in my personal Google Drive and it was a pain to go back and forth between my personal Google Drive and the school Google Drive. I still love Google Forms and Google Slides etc., but I use them through Blogger which is a free blog publishing service by Google. If you have a gmail, then you have access to Blogger!
Here’s how to get to Blogger… Open a tab in Google Chrome. (You need to be signed in to your gmail.) In the top left part of the page you opened, you will see the waffle I highlighted. Click that waffle and you will see lots of stuff you can use. You may need to use the slide bar to find Blogger. Blogger has a funny looking B with an orange background. Click it! Follow the directions to set up the blog. The best thing to do if you are unsure of how to do the set up is to go watch a YouTube video. When I set mine up, I just fumbled my way through it. Don’t worry about a custom domain. You have to pay for domain names, so stick with the name that blogger has you create.
Go check out my Blogspot if you’d like an example. I’m giving you a chance to check it out so that you can use my ideas. It’s been recently updated, so it does not look exactly like the picture below. Here’s the link: https://mrshamitersclass.blogspot.com/.
Now that you have this platform, you just need to give your students the link. I teach 3 different subjects. I could have a Blogspot for each subject, but I thought it would be easiest to have just one. I usually like to give assignments in the sidebar using “pages” and make announcements to all classes on the main section of the blog which is called the “posts”. I’m not always consistent on that, but students know to look in both places. I also have started using a Google Calendar which is another way to attach lessons and/or quizzes and tests.
My purpose for giving my fellow math teachers access to my Blogspot is because I want to help. Even if you do not want to create your own Blogspot, then feel free to rummage through mine and find things you need. Also, I will be posting lessons for my students starting tomorrow.
While I’m at it, I have a free item to give you. A perfect tool during this time of distance learning is Boom Learning. Click here to get my free Domain and Range Practice Boom Cards. If you’ve never used Boom Cards, you can add a new platform to your list of online tools! You will not regret it. They are easy to use and self-checking.
We will all get through this crazy time. Teachers are the toughest people I know. Be strong for your students. They look to us, so we must remain in control and be good examples for our students. I wish you well and please let me know if I can help you any further.
It’s finally trig time! Yay! I love trig. Students tend to enjoy it too because it is so different from everything they have been taught so far. Over the years, I’ve tried different approaches to teaching trig. I know what kids struggle on and I finally feel like I’ve got a good way of teaching it. I see my trig unit broken into these parts:
Intro to Trig
Practice Finding Opposite, Hypotenuse and Adjacent
Setting Up Problems and Solving Them
Practice
Review
Assessment
More Assessment
Trig can be simple but to some students it can be complicated. They actually love it once they get the hang of it and how fun is it to use the calculator this much?! (When I first learned trig, we used charts to find the answers. We did not have calculators that would do the calculations. Yes, I’m old!)
When I created this unit, I knew what the two main issues were with teaching trig: 1) Teaching them which trig function to use 2) Teaching them how to solve the different types of problems
I decided to work backwards a little. In my introduction, I just tell them (As Bill and Ted would say) we are about to embark on an excellent adventurecalled Trig. I introduce a right triangle and tell them to visualize that they are in a right triangular room. They are sitting in one of the corners (not the right angle). I go on to talk about where opposite is and how when you are sitting in the corner, you can touch the hypotenuse and adjacent sides at the same time, but you can’t reach the opposite side. There are some notes we take and then we play a dice game.
For the dice game, I usually get my first class to cut out and put together the dice. Now I have the dice for the rest of the day. I put students into groups of 3 or 4 and they are competing against the rest of the class. There are three dice. One with triangles, one with dots and one with the words, hypotenuse, opposite and adjacent. Click the link below to watch the dice game which practices knowing the different sides with respect to a certain angle. Dice Game Short Video.
Before going any further, I teach kids SOH CAH TOA and we do some practice on finding those ratios. That part is normal progression, but here is the part that might seem a little backwards:I teach them how to solve trig equations next! The students do not know how to set them up yet, but I have figured out that if I go ahead and teach them how to solve the equations, then once they start setting them up, solving is a breeze. I teach them how to solve these three types of problems:
Looking for an angle
Looking for a side and the x is in the numerator
Looking for a side and the x is in the denominator
By the way, when teaching them how to solve these problem, get them to completely solve for x before typing anything into the calculator. Don’t let them find the sin of an angle, then multiply by the side. Let them type the whole thing in: 12 sin(36). I like this method because then the students aren’t rounding answers until the end of the problem. You can see that I did that in the examples above in problems 5 & 6.
Next is the PowerPoint. In the picture to the right, you can see one of the slides in the PowerPoint. Only the triangle with the sun, and the two arrows appear and students have to name which trig function is being referenced. I don’t use degrees for a while, I’ll just use symbols. I don’t want the variables and numbers to get in the way. Toward the end of the PowerPoint, the students are asked to set up the problems and then at the end, they go back to solve them.
Now it’s time to practice. I have 3 worksheets that help students find missing sides and angles. The first one places only an x on one side, a number on a side and gives one angle. This makes it easy to determine the trig function and it is like the PowerPoint. The next worksheet gives the students two sides and asks them to find the missing angle. The last worksheet is the toughest because now the students have to find x, y and z… two sides and an angle. This is much more difficult because it will not be obvious from the start which trig function to use. Students need to see that they actually have a choice sometimes and they need to decide where to start and ignore the extra info. I also throw in some special right triangles and an right triangle altitude problem to see if they remember those rules. The PowerPoint from earlier brings up that there might be more than one way to solve a problem, so hopefully when they get to the worksheet, they will use a quick special right triangle rule instead of trig, but if they can find the answer either way, I’m happy.
I have another resource that is not in this trig unit that I do at this point. It’s the Trig Maze. The students really get into it and work at it. It’s cool to work a problem and then see your answer on the paper (they are thinking, “YAY, I did it right!”) and it’s even cooler that it leads you to the next problem you are supposed to work. The maze comes with an answer document, so you can see all of their work!
Finally, I like to do some task cards with some real-life situations. Some of the task cards contain a ladder against a building, finding a flagpole height, finding the diagonal in a rectangle etc. There are 12 of these problems.
I end the unit with what I call the “Poodle Problem”. It is a group of 5 triangles that have been put together to look like a poodle. Go back and look at the very first picture at the top of this blog. That’s the Poodle Problem! The students find all the answers, then total them for one final answer. How fast is this to grade? Super fast! It’s a great quiz and a great end to the unit.
I’m not finished yet! Now I like to test all of the right triangle content. I have a test that I call the Right Triangle Test that has 10 questions with the following problems:
One Pythagorean Theorem Problem where they have to find the perimeter of the triangle.
One Right Triangle Altitude Problem where they have to find the perimeter of the triangle.
One 30-60-90 Problem where they have to find the area of the triangle.
One 45-45-90 Problem – easy, they just find the hypotenuse
Six Trig Problems – Just find a missing side, except for one problem is like the task cards, but a little tougher.
I had problems with cheating one year, so I went crazy and made 5 versions of the same test. You even have a choice of an answer bank or no answer bank. One of the 5 tests is a shortened version that I’ve used as a retest or a modified test. (It gives the students a little help on setting up some of the problems too.) I don’t like to give long tests. Students get enough testing. I like tests that are short and to the point. As long as I can tell they “get it”, why does it have to be super long?
I’m very happy with this unit. The only thing that it doesn’t contain right now is angle of elevation and depression problems. I’ll try to add this to the unit this summer. These problems were a big deal at one time, but it seems like we’ve gotten away from them in Geometry. I still think it’s good for students to see them.
Trig is fun and different and essential to future math classes. Below is all of my right triangle lessons including the Trig resource I’ve been talking about. What’s next on my agenda after right triangle trig? Law of Sines and Cosines of course! Law of Sines and Cosines is sold separately in my store, but it is also a part of Unit 7 below.