Posted on — Leave a comment

Give Your Students Hope on a Math Test

Semester finals are coming! Of course you will review and try to prepare your students, but time is limited. How can you help your students do better and still keep your standards high?

USE   AN   ANSWER   BANK.

If you have a 20 question test and you have 20 answers in an answer bank, your test is still challenging but you are giving your students hope which means they will put more effort into trying! That’s what we want, right? EFFORT! 

Will some students guess by using the answer bank? Absolutely! When I give an answer bank, I have two rules:

  • Students have to keep the test for a certain amount of time before turning it in.
  • Students have to show work on all of the problems. 

Try it this year. I think that you will be pleasantly surprised. If students feel like they have an advantage, it makes a big difference in their attitude. Please let me know how this goes for you.

I have two final assessments with answer banks if you would like to try them. (My Algebra 1 Final with an Answer Bank is in the works. Be on the lookout for it soon!)

Finals with answers banks are below:

Posted on — 1 Comment

Algebra STAAR 3 Week Review

Here we are again getting ready for another Algebra STAAR test. Last year was crazy and very hard to prepare students. This year is just as challenging, but in a different way. Last year, no one expected much from the students. Learning math online is super tough. This year, the expectations will be higher. We’ve had a full year of being back in a building. Students have learned more this year, but how will they perform after having some pretty dramatic learning loss from the past few years?

We are well into the 5th six weeks at this point and I only have quadratics left to teach. As far as reviewing for the STAAR, I’ve started a few things. We made STAAR flashcards from the task cards that are in one of my resources and students have done some of the boom cards to practice fill-in-the-blank questions. I’m going to start tutoring once a week after school and invite students that did poorly on the Algebra STAAR benchmark we just gave at the end of February. I will begin a three-week focused STAAR review on April 11th.

Here’s my plan for the last three weeks leading up to the test: (You will not see much on quadratics in this review since this is the topic that was just completed.)

Week 1: Bell Ringers for the next two weeks will be key features of linear, quadratic and exponential graphs. Obj. 4 – Correlation Coefficient and scatterplots for quadratics and exponential functions. Obj. 12(b, c, d) – Evaluating Functions and Algebraic and Geometric Sequences.

Week 2: Domain and Range for Linear, Quadratic & Exponential (Obj. 2a, 6a, 9a). Review of Systems (Obj. 2i, 3f, g, h, 5c). Review of Slope and Graphing Linear Functions (Obj. 3b and d).

Week 3: Start a brain dump. Use the brain dump for bell ringers. Obj. 5a – Solving Equations, Obj.10e – Factoring, Obj. 11b – Laws of Exponents

*I cannot plan for other students that are not mine, but this is a general plan that should work for most situations. Think about your own students and what their strengths and weaknesses are!

**These topics were strategically selected by analyzing past Algebra STAAR exams and knowing the Readiness Standards.

All of this material is in one place in my store if you are interested in purchasing. Click on the pic below to find it in my store:

Posted on — Leave a comment

7 Reasons to use Bell Ringers in High School Math Classes

I’ve used bell ringers (sometimes called Do Nows or Warm-ups) my entire teaching career until the pandemic. For over a year, I quit using them. I was juggling too much to add bell ringers to the mix, but I’m happy to say that I’m using them again. I debated over whether to start using them because I do have a few cons that bother me.

One of my cons for using bell ringers is that it requires a transition from one task to another and sometimes transitions in a classroom are hard to deal with. Another con is that you have to think of what you want your bell ringer to be and that requires time which we as teachers have very little time.

The pros far outweigh the cons when it comes to bell ringers. I have 7 reasons why I feel like bell ringers are worth the struggle. It makes sense to me to continue using them because of what bell ringers provide.

  • #1 – Get the students busy from the start! As a teacher, the beginning of class is a chaotic time. We need to get the students settled and do attendance. If students are in a routine to come into the class and get started on the bell ringer, then the chaos is limited and the teacher has time to get organized.
  • #2 – Use bell ringers to recycle information or to review information. Maybe you want to review the first grading period during the second grading period using bell ringers. I’ve learned that 3 or 4 problems is the limit. A quick way to create something is to use material that you were not able to use during the first grading period. You might have run out of time to do a worksheet or maybe you did not get to go as deep as you wanted. Divide that worksheet into days and give it to your students at the beginning of the week. Students get the worksheet out at the start of class each day and work on it. (I have my students tape everything into their journal so they do not lose it.)
  • #3 – Use bell ringers as a quick check to find out what students know. For instance, before a lesson on the properties of exponents, you decide to see if students remember how to use integer operations or if they remember that 5^3 really means 5*5*5. Before any lesson, think about what might cause some issues. Do not assume that students remember their math from past grades. Give them some problems and see what they remember. This will guide you to take a moment to reteach some concepts before you get started.
  • #4 – Bell ringers can simply be a way to get your students thinking or “get the wheels turning” as they say. Some teachers call bell ringers warm ups. That’s a good name! Before you run, don’t you warm up. You want to get the blood flowing and the muscles stretched. The brain is no different. It’s great to have students focused and thinking before you begin a lesson.
  • #5 – This reason is related to #4 above… Use bell ringers as a lesson opener. To get the “wheels turning” use a problem to spark interest in the topic you are about to teach. Real-life problems are a great thing to use. It really doesn’t have to be anything but a picture or a simple question. For instance, before a quadratic lesson you could have a picture of a football player throwing a pass. You could ask students to predict if the throw is accurate or how many yards the ball will travel. The great thing about this kind of question is that anyone can answer it. All kids are on an equal playing field. All students can be successful on these types of questions.
  • #6 – Here’s a biggie… Use bell ringers to fill in gaps. Welp, we all know how important that is at this time. Think about the students you teach. What’s missing in their learning. What did they NOT learn the past few years that you can practice through bell ringers? You could literally pull material from the previous grade level and reteach it. If your state has standardized testing, go pull from old tests. You could even go back a couple of grade levels. Think of the good this would do!
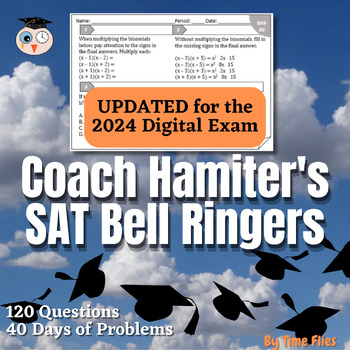
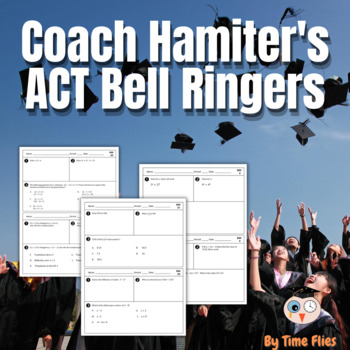
  • #7 – Use bell ringers to prepare students for standardized tests. Not all math teachers think about preparing students for college entrance exams or college placement exams. Your students will be taking tests such as the ACT, SAT, PSAT, TSI or ACCUPLACER. Why not give them a taste of what they will see on these tests? Students are not familiar with the questioning used on these types of tests. What a great service you would be doing for your students if you helped prepare them for what they might see on college entrance exams.

I hope I’ve given you some ideas. To me, bell ringers are another learning opportunity. To provide the best thing for your students, you need to think about your particular groups. My Algebra students need something different than my Geometry students most of the time. The only time that I may give them the same bell ringers is if I’m in the mode of preparing them for the TSI or PSAT.

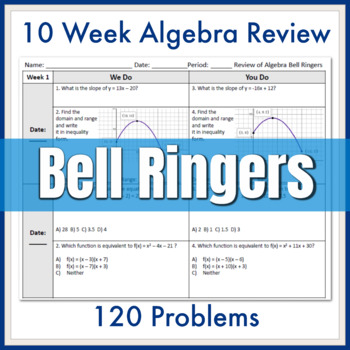
My biggest concern for my Geometry students is how much Algebra they lost last year. I created an Algebra bell ringer resource just for them. When I’m doing these bell ringers with them, I’ll ask them to raise their hand if they remember certain things. It’s terribly disappointing how little they learned last year. I’ll link this resource below if you are interested, but here is a freebie related to those bell ringers. Each day there are four problems. I work two with them and then they do two on their own.

Your next question might be, should you grade bell ringers? I usually grade on completion. I have students keep the bell ringers in their journals, so sometimes during a journal check, I might refer back to certain bell ringers and ask them questions about them.

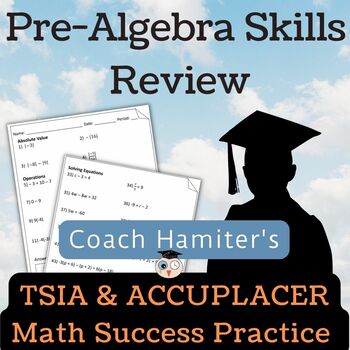
I’ve attached some of my bell ringers below that are in my TpT store. Half the battle is having time to create them. Remember, bell ringers do not have to be something you create. It can be an old worksheet that you didn’t get to or it can be review material that you have. I’ve used my TSI material a lot as bell ringers. I’ll pull a page out of a lesson and it will become my bell ringers for the week. The great thing about TSI or ACCUPLACER material is that it covers a variety of content that students should know from past math classes.

Here’s what I’m currently using with my Geometry Classes:

These next two resources are for college entrance exams:

I use any of my TSI resources to pull from for various reasons. I recently pulled from this activity for my Algebra class bell ringers to help recycle previous concepts:

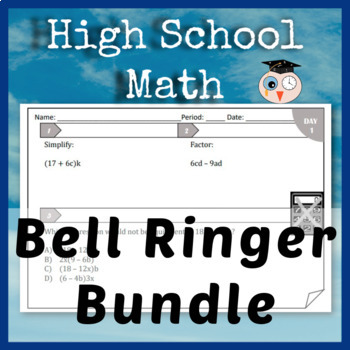
I have all of my bell ringers including in one bundle so you can save:

If you like my ideas and tips, then consider joining my email list. If you chose to do that, then you will receive a free exponential function hands-on activity. Join Now!

Good luck with your bell ringers. If you are not on board, I understand. I have my reservations at times too. You need to do what is best for your situation.

Please follow me at my TpT Store so that you know when I upload new resources. All my new resources are 50% off for 24 hours.

Posted on — Leave a comment

Help Struggling Students Factor Quadratics

It’s the truth! Factoring is a major topic and somehow, we have to make sure students can do it. Factoring is needed for all math classes after Algebra and for all college entrance exams (SAT, PSAT and ACT) and placement exams (ACCUPLACER and TSI). Algebra teachers have enough on their plate without this pressure, but it’s our job to teach it and hopefully it will be reinforced in future math classes.

About ten years ago, one of my coworkers showed me a cool calculator method that I use with struggling students. Some students have a hard time with their multiplication facts which will make factoring a nightmare for them.

I hate most calculator tricks, but this one is actually a great tool. Let’s say a student needs to know all the factors of 135. Have them go to the graph of the calculator and type 135/x (135 divided by x). Next have the student look at the table. In the table, they will look for whole number values. For instance, across from an x of 1, is a y of 135. That of course means that 1 and 135 are factors of 135. The next set of whole number values are x = 3 and y = 45. When the list of numbers starts repeating, all of the factors have been found.

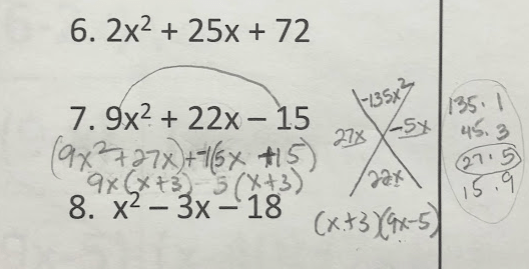
Look at the sample factoring problem below this paragraph. I have my students multiply the 9x^2 and the -15. The answer is -135x^2. To the right of the problem, they draw a large X . On the top, they write the -135x^2 and on the bottom of the X, they write the middle term: 22x. Next, they start making a list of all of the factors of 135. I tell them not to think about the negative at first…just make a list of factors. If they are not able to do that, then use the calculator to make the list. Once the list is made, then the students decide which factors will multiply to get -135 and subtract to get 22. The answer would be 27 and -5. Those two numbers are written on the left and right side of the X. Next, the original trinomial is turned into a polynomial with four terms. The second step below was 9x^2 + 27x – 5x – 15, before I started the grouping process. The problem is grouped and the factors are found. (Yes, I teach grouping. It helps with this type of problem and it helps with factoring out a GCF. Don’t skip grouping. If you’d like to see more about how I teach factoring go to this Factoring Blog Post.)

Here’s a quick video explaining the same problem:

All students can factor! Believe it, teach it and recycle it!

Posted on — Leave a comment

Take A Picture, It Will Last Longer And Be More Effective For Your Math Lesson

Real-life examples in math are super important, but it takes time to think of examples and to prepare a lesson using your examples. A quick way to make a lesson interesting and tied to a real-life situation is to take a picture then pose a question. This gets students to analyze details of a situation.

In the next few weeks, I will be talking to my Algebra students about arithmetic sequences and direct variation. I have a great blog post titled, “Examples of Real-Life Arithmetic Sequences.” Check it out if you’d like. I love all the pictures in that post, but I thought I’d take a new picture that I could pose a question to see what the students would say. Below is the question and picture. Feel free to use it yourself if you like it. 

(Yep, that’s my dishwasher in the background😂)

I’d give students a little time to think and jot their thoughts down. Next, I’d ask for feedback. Finally, my plan is to let them create a table using height of cups vs. number of cups for each situation. We will create equations and graphs and talk about the similarities and differences. Students will pay more attention to the details and take part in this activity. All the students will need is some grid paper and the picture which I will post on the board and in Canvas for them.

As a side note, I took this picture with my iPhone, then I used a free app called Layout from Instagram to create the collage. I used another free app called Typorama to add the question. Very simple and easy once you’ve done it a couple of times. I save all my photos in Google Photos which is easy to get to via phone or computer. 

Posted on — 1 Comment

Get Your Math Students Engaged!

How is it going in your classroom? If it seems that your students are not paying attention and just not getting the concepts you are delivering, could it be that you are not engaging them? When school really gets going and you are super busy, it seems like we go into survival mode. The way we survive is lecturing because we really don’t have time to plan and be creative. I’m going to give you some ideas that turn a dull boring lesson into an engaging lesson without much prep.

Here are 5 Easy Ideas:

1) Get the dry erase boards out and dust them off! Kids love to draw on the boards, so give them equations to solve, equations to graph or shapes to draw. Maybe you had a worksheet planned. Don’t do it the traditional way, instead call out the problems and let them work them on the board then raise the board up to show you. You can make corrections and help kids that are struggling. You can have students show their partner and talk about which person may or may not be correct. Dry erase boards are a savior for me. I get them out anytime I feel like I have a boring lesson and it really spruces it up. 
2) Find a related Desmos lesson. Desmos is easy to use and can be something quick to search and find quick lessons or activities for your students. If you are teaching exponential functions soon, I have a good activity from Desmos that I created. I would say to do this with Algebra 2 rather than Algebra 1. It’s called “The Towers“. I love the Tower of Hanoi and I use it in my Exponential Functions Stations. 
3) Another quick way to gain interest in note taking is make the notes colorful or turn it into a graphic organizer. If you have 4 things the students need to know, then create a paper folding graphic where students write on the outside 4 flaps and they open to reveal answers, definitions or a diagram. 
Here’s two examples of using colored pencils or using a foldable:

4) Let the students partner up and go to a spot on the board or use poster paper. Ask them to write everything they know about a topic. I recently did this and the students did not realize how much they actually knew. I kept adding stuff and reminding them of a few things along the way. Before they knew it, they had a ton of concepts on the board. 
5) Turn the lecture into a game. One way is to make it a Bingo Game. Create a list of things you know you will be saying that day and put it on the board. The students will be given a blank bingo card and can write the words randomly into the boxes. As they hear you say the phrase or word, they cross off that box. If they bingo, you will take off a couple of problems on the homework to shorten the assignment. 

If you look up from a lecture and you have kids falling asleep or looking at their phones, you know you’ve got to do something to change the dynamics of the class. Try implementing one or two of these ideas in the next few weeks and let me know how it goes!

Posted on — 1 Comment

Domain and Range

Why is domain and range so tough for students? I’ve really worked on slowing down and teaching domain and range in detail the past few years. The idea that students are asked to find all the x’s and y’s that belong to a graph or situation is overwhelming. I believe part of the problem is that the concept is abstract. It’s not physically possible to name all the points that exist on a line. Students are not digging deep and realizing what the line or curve is really displaying (or saying). We’ve got to get them to see the details on the graph. Where does it start? Where does it end? What is happening between? I’ve created some online items that have worked well recently, but I have some older resources that I like to use too.

It’s important that students distinguish between finite and infinite values and which type make more sense for the problem. Give students real-life situations and make them think about these situations and what the graphs would look like in detail. A great example of a continuous function is when someone is getting gas out of a gas pump. Here’s a video you can use as an opener. There are tons of questions you could ask students about what is happening.

The concept of a vending machine is a great example of input and output (which would be a finite situation). If you push a certain button, then you get a certain item.

Photo by Erik Mclean on Pexels.com

Last year, I created the lesson below. It is a Google Docs with an embedded Google Drawings. Students can click on a Google Drawings and move pieces around or type. I have found this to be very interactive and useful.

Here’s a sample:

In the same activity, before I start having student plug into a table, I have them work on a function machine:

Function Machines in Google Drawings

This activity has 3 parts:

  • Relations and Functions
  • Domain and Range
  • Infinite vs. Finite Domain and Range

Below is another useful activity that I think works well for students each year. This lesson introduces reasonable Domain and Range and we practice which variable is independent and which one is dependent. The worksheet seen below is a tiny look at this activity that contains 10 graphs where the students are asked to find the domain and range. There are 5 linear graphs, 3 quadratic graphs, one circle and a graph with only points. Another worksheet asks students to create graphs with a given domain and range.

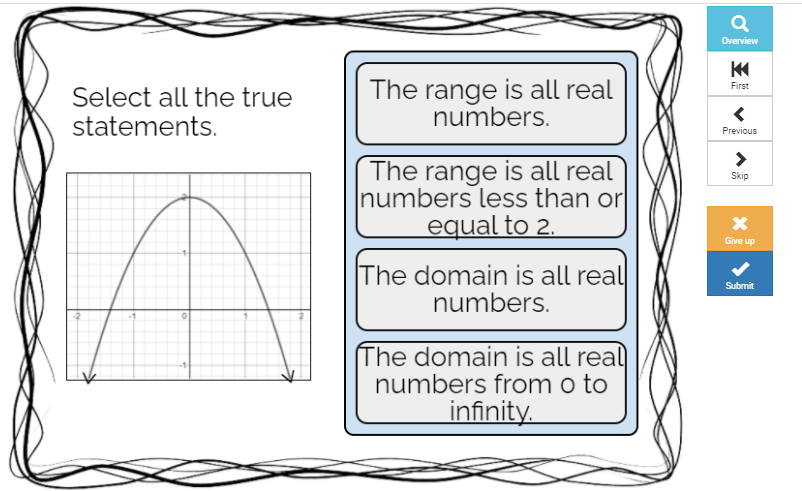
I love Boom Cards, so I’ve got a couple of Domain and Range activities that are great for extra practice. The problem below is a sample question in this activity. The students do not know what a parabola is at this point, but I still give them all types of functions. We will come back to domain and range again when we get to quadratics and exponentials. If you click on the picture, you will be taken to a 4 page preview of this activity.

Finally an escape challenge is the ultimate fun activity to end Domain and Range. If students can get through this tough challenge, then not only do they understand domain and range as well as reasonable domain and range, but they are good at following directions, reading carefully, figuring out combinations and they have that finishing spirit!

Posted on — Leave a comment

Learning Loss in Math

Learning loss is evident this year. I’m sure you have noticed it too. How do you deal with it? We can either complain about it or we can do our best to address it.

When I coached basketball, we practiced fundamentals everyday. The kids could already dribble and shoot layups, but we still practiced these skills to keep them sharp. What would be wrong with doing this same thing in a math classroom? No, don’t bring a basketball into your classroom. All I’m saying is practice those math fundamentals. There will always be learning loss and students will struggle with certain concepts in math. We should plan for it every year! Here are a few ideas on how to deal with it. If you have some other ideas, please let me hear from you.

1) Plan for mini lessons on content that you have a feeling students will struggle with. 
2) Figure out which students are your star students and make them helpers. Let them tutor other students during class time. 
3) Use bell ringers for content students should have learned last year. (I have algebra bell ringers for Geometry students if you are interested.)
4) Add a problem or two to your worksheets with content from the previous year. 
5) Use dry erase boards to have students work problems, then show you quickly if they understand.
6) For fundamental work, do quick timed worksheets. Let’s say students do not know the order of operations. Give them 5 problems each day for a week. Have a set time and do not go beyond that.
7) Announce a tutoring session that covers a basic skill. You could say, “This Tuesday after school, I’m going to focus on one- and two-step equations.” 
8) Use those videos you made last year to reinforce the material this year. You may do an in-person lesson and then post a video so students can watch it if they need it. 
9) Give students flash cards to study. Let’s say some of the students are struggling with operations with integers. Give them some index cards and some problems with solutions. Put the problem on one side and the solution on the other. 
10) Sage and scribe is a great way to get students to work through some problems and see if they know what they are doing. My algebra students are struggling with combining like terms. I could have one person stand (this is the sage) beside the other person’s desk (the scribe) and talk the scribe through simplifying an expression. The scribe can only write and is not allowed to talk at first. This is great since both students are really having to concentrate on what they are doing. The two students switch roles after each problem. 

If I could add a #11, I think I would say to just make learning more fun. Get students excited about your class. Get them more involved. When I feel like I’m being boring, I pull out games. Students want to have fun. Here are a few games that I use in my classroom:

I hope you can take an idea or two and implement in the coming weeks. Let me know what worked and what did not work. This is going to be a tough year on math teachers. Don’t let anyone put too much pressure on you. You can only do so much. Try your best, but remember to take care of yourself. 

Posted on — Leave a comment

Solving Equations in Algebra

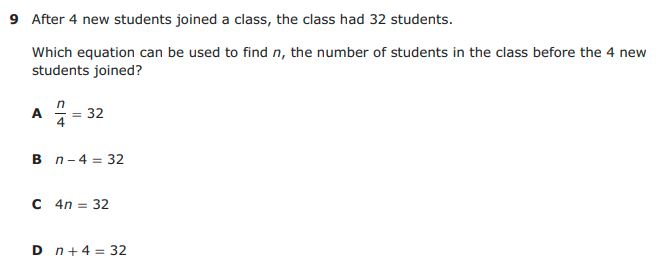
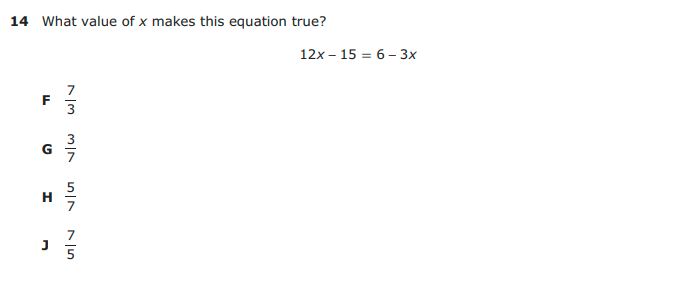
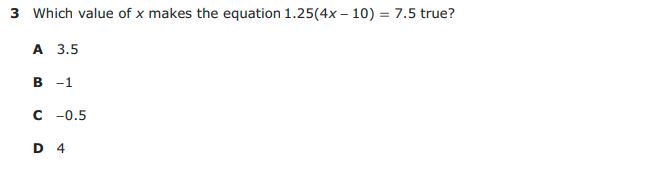
In Algebra, teachers tend to start completely over with solving equations as if the students have never seen equations before. Students have been solving equations for a while at this point. I thought it would be nice to take a look at a few questions from the state assessments in Texas to show what the students should know before coming to Algebra. I am a stickler for understanding what students should already know before they get to me and what they will learn after my class. This helps us to know what and how to teach certain content. My advice to all new math teachers: Do not get stuck in one math subject. Move around above and below where you like to be so that you understand fully what students have learned and will learn. Take a look at the questions below to get an idea of what they are tested on in 6th and 7th grades:

2019 6th Grade Math STAAR Test – By the end of sixth grade, students should be able to set up one-step equations and solve them.
2019 7th Grade Math STAAR Test – By the end of 7th grade, students should be able to solve 2-step equations.

I don’t think there is anything wrong with reviewing the material. If you read my last post about Algebraic Expressions, you learned that I still review this every year. I do think this means that we should not spend too much time covering material that they should already know. The Pandemic has caused some issues with learning gaps, so it’s important that we recognize that we might have to review, refresh and even reteach. Continue to look at the next set of problems to see the progression:

2019 8th Grade Math STAAR Test – By the end of 8th grade, students should be able to solve equations that have variables on both sides of the equal.
2019 Algebra Math STAAR Test

It’s obvious by the time students finish Algebra, they should be able to solve multi-step equations with variables on both sides that contain the distributive property and might contain decimals or even fractions. It is very important that students understand how to check their answers. If the test is multiple choice, they will be able to get the answer correct by plugging in the answer choices. (I don’t like that, but before the STAAR test I make sure they know all the tricks and tips.)

My progression on teaching students how to solve equations goes like this:

  • Review solving one- and two-step equations. Discuss how an x is really 1x. Discuss inverse operations.
  • Practice checking solutions.
  • Use the distributive property in equations. Show students how to distribute and other alternate methods depending on the look of the problem.
  • Solve problems with variables on both sides. Use combining like terms.
  • Solve more complicated multi-step equations.
  • Solve equations with decimals and fractions. Teach students to clear decimals and fractions. (This is a skill that will come in handy on the college entrance exams.)
  • Solve equations that have no solution or infinite solutions.
  • Setting up and solving equations from word problems.

You may end up spending more time in this area than you planned, but think about how much it will help the students in other areas. If they have a good foundation of solving equations with one variable, then solving inequalities, literal equations, linear functions, quadratic functions and exponential functions will be much easier.

The progression that I discussed earlier is contained in some lessons that you will see below. I bundled this material in a comprehensive unit that contains:

  • Expressions
  • Solving Multi-step Equations
  • Special situation in Equations (no solution, infinite solutions, clearing decimals and fractions)
  • Writing and Solving Equations
  • Equation Assessments
  • Inequalities
  • Literal equations

This will be what I’ll use this year in my Algebra classes. All of these activities come with a PowerPoint for notes, a PDF packet with notes, practice and a quiz. There are also a few digital activities dispersed among the resources. Good Luck and remember how important it is to give your math students a strong foundation!

Here’s how I start with solving equations.
A look at special situations.
Students must know how to set up equations.
This is a variety of assessment options.

The Whole UNIT!!!

Posted on — 1 Comment

Algebraic Expressions

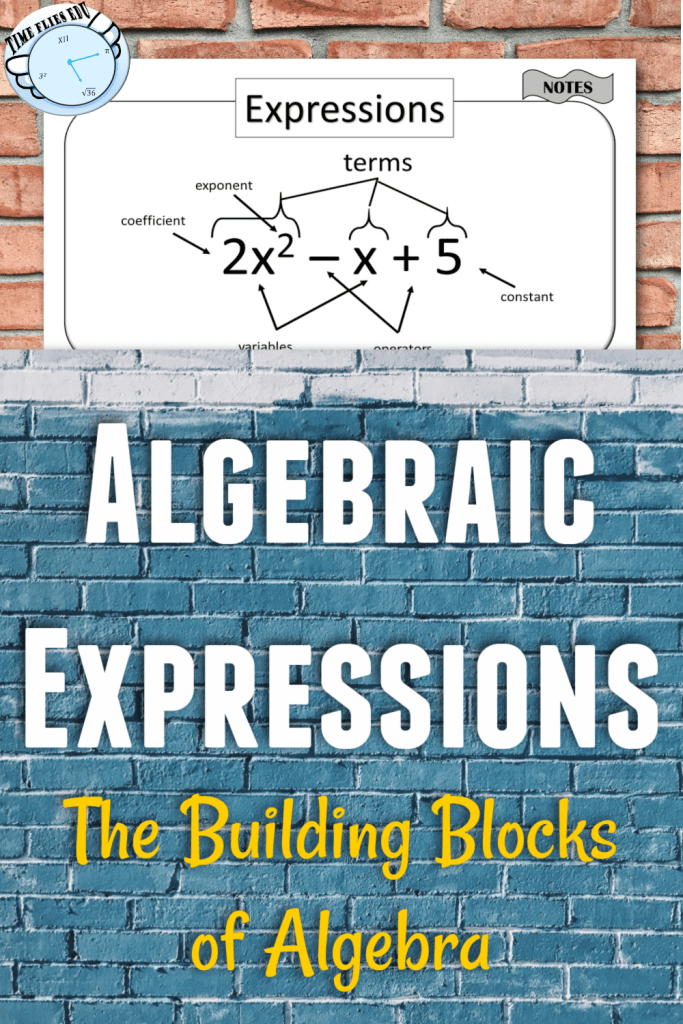
By the time students are in algebra, they should have experience with algebraic expressions. I never feel comfortable enough with this fact, so I always start the year with a refresher. Expressions are the building blocks of algebra, so it’s better to cover this topic and make sure students have a good foundation before heading into solving equations.

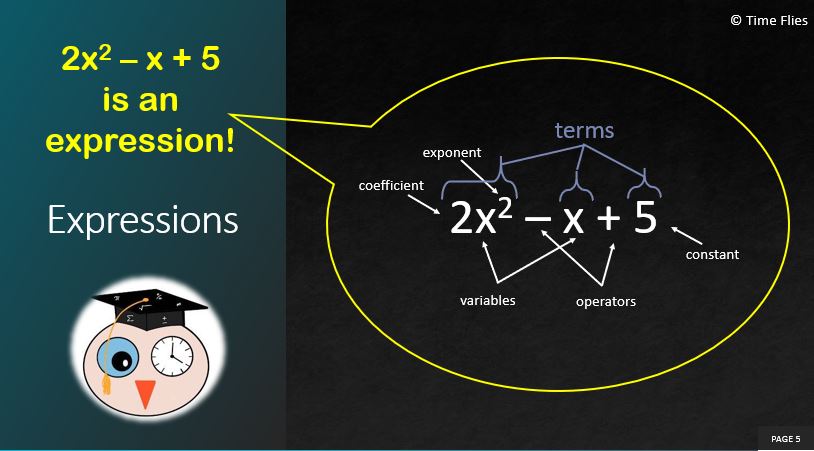
As I begin the year, I like to review operations with integers and rational numbers, order of operations, expressions and terminology. Terminology is key. Students must know what you are talking about when you use words such as like terms, coefficients, variables, distribute and constants. Also, never assume students know things like a fraction is really a division problem and all numbers have exponents of 1 when no other exponent is visible. Get all of this taken care of in the beginning and you will find out really quickly who has these foundational skills and who doesn’t. I will not get the calculator out until after all of this material has been covered.

Here’s the content that I like to make sure to cover during the expression lesson:

  • Setting up expressions from phrases like: five less than twice a number
  • Evaluating expressions by plugging in a number for a variable. It’s important to review order of operations at this point.
  • Simplifying expressions using combining like terms and distributive property.
  • Using applications with expressions.

If students are able to do the 4 items above, they will be in a good position for success when moving to solving equations. I will probably take a week to practice expressions, but I feel like this is time well spent.

My lesson plan will look something like this – (I’m on a block schedule, so I see my students 80 minutes two days and 50 minutes on Friday.)

Day 1:

  • Bell Ringer – Operations with Integers
  • Math Terminology
  • Expression Opener
  • Setting Up Expressions
  • Evaluating Expressions

Day 2:

  • Bell Ringer – Operations with Rational Numbers
  • Simplifying Expressions
  • Practice Writing, Evaluating and Simplifying with a Partner
  • Application with Expressions – Digital Practice

Day 3:

  • Quizizz Activity – (I have a Quizizz Activity that practices the skills used in the application activity.)
  • Quiz – Short quiz that will let me know how well the students understand the concept.

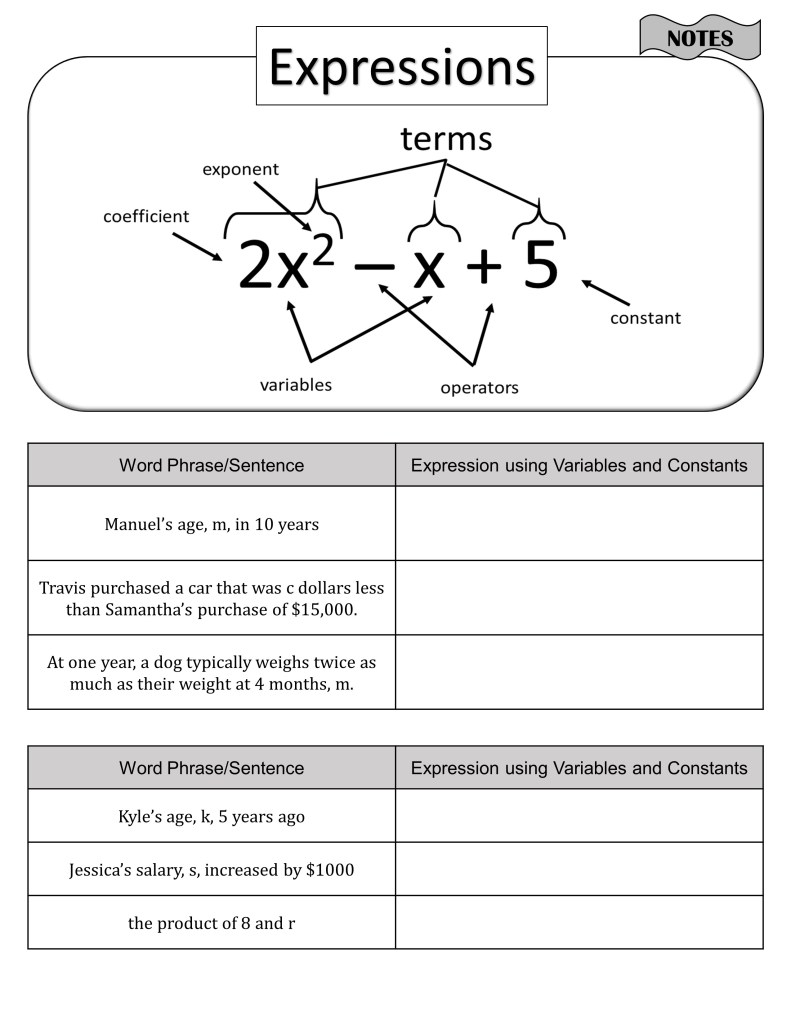
I have a resource that covers all of this material. The expressions lesson that I created has a PowerPoint that goes through the terminology and example problems. I like students taking notes and following along, so I have note pages that follow the PowerPoint.

Expression PowerPoint
Note Page Example

The lesson comes with a practice page that contains 12 problems covering the three categories: writing expressions, evaluating expressions and simplifying expressions. The quiz has a section where students fill in terminology and the rest of the problems are multiple choice for quick grading.

The application part of this activity is a Google Slides where students show that they understand what an expression is versus equations or inequalities. Students then see some perimeter problems where the dimensions are expressions. Students solve the problems two ways. There is a video tutorial that walks students through simplifying some expressions with the distributive method.

Expressions are the foundation of Algebra. Students start learning expressions early in their math classes, but variables are an abstract concept and tend to be something difficult for them. The more we expose our students to understanding the purpose of a variable, the better they will grasp it. Give your classes lots of examples of how expressions might be used and keep checking for understanding. See if they can come up with their own examples. If they can create their own expressions and tie it to a real-life concept, then you know they have made the leap to understanding this idea.

If you’d like to look further into my Expression Lesson, I have linked it to the picture below. Thank you for going through this thought process with me and good luck with your students.