Biology Supplemental Resources for Busy Science Teachers

Creating resources is a family affair at my house. My husband is a biology teacher and has been creating his own resources for a while now. For the past 7 years, he has been the lone biology teacher at his campus, so out of necessity he has to create most of his curriculum. He has decided to bundle all of his labs, activities and assessments into one bundle. So far this supplemental bundle contains 47 resources! The best part about his resources is that he uses every single one of them, so they are classroom tested. One thing that is amazing about selling resources on Teachers Pay Teachers is the ability to improve and add to your resources and this is a constant practice that both my husband and I believe is important. My husband’s description of this bundle is below:

This bundle contains resources I’ve created out of necessity over the years. It has always been my goal to make things fun/interesting but still contain the necessary learning objectives. When I create a resource, I ask myself “If I were a student, would I want to do this?”  I also enjoy watching my students doing the assignments. Actually, they have helped in the development of each resource by finding mistakes, letting me know if something is unclear or confusing and, just if they enjoyed doing it. There have been many times an English or Math teacher has come to me and said “When your kids come to my class they are still talking about what they did in Biology!”  Me: Yesss!

The 47 resources in this bundle can be broken in 4 categories. Out beside each one, I’ve listed how many of those types of resources are in the bundle.

  • Labs (8)
  • Assessments (9)
  • Units (2)
  • Lesson/Activities (28)

Lab Spotlight

The biomolecules analysis lab probably has been through the most research and development in my classroom. It was given the name “Goop Lab” by students at some point. While it requires considerable prep and materials, the students get a real understanding of which foods contain which nutrients. It clears up misconceptions about food and creates a lot of discussion opportunities—especially when students compare their predictions to the actual results. If you are only interested in labs, I do have a lab bundle that contains my 8 lab resources or you can buy each individual lab in my store.

Assessments

These tests have all been written to follow the activities and labs included in this bundle. One of the most difficult concepts year after year is cell processes. Many students struggle learning things they cannot see. I’m thinking about the Cell Processes test over DNA, Mitosis and Protein Synthesis. I chose images for that test similar to what students will likely see on a state assessment. For a better understanding of cell processes, it is important they can tie the vocabulary to the image.

I’m not big on giving long tests or quizzes. Tests take up time and I like them to be concise and to the point. It is important to me to make sure they cover the objectives, but I never go overboard on giving long tests. Most of mine are 20 questions or less except for the semester exams. If you are only interested in a test bundle, see below (and all my tests are sold individually as well).

Units

I chose two topics to offer as an entire unit: Enzymes and Energy Transfer (cellular respiration + photosynthesis.) These objectives are heavily emphasized on state assessments and, of course, among the most difficult concepts for students to master. Again it is “cell processes” which is something a student cannot see but must understand. I have had good success in my urban-setting classes with each of these.

This unit contains presentations over photosynthesis and cellular respiration with presentation notes for the teacher. Students will be able to take notes from these presentations in their interactive notebooks. There are worksheets over both photosynthesis and cellular respiration. Matching cards are available for an extra activity to help clarify the information. This unit also contains a yeast lab and a 20-question assessment. Answer keys for all worksheets, matching cards and tests are included.

Activities/Lessons

Twenty-eight items is (conveniently) about the number of weeks you have in school that you are not interrupted by testing/field trips/other, etc… Kidding aside, these are all learning-objective-driven and have been developed over several years with much student input. Many of these are matching card activities that have been particularly successful. I keep matching cards out all year and I will routinely use them to fill the last 15-20 minutes of a class. The students will say “we’ve already done these!” Then I say “Okay, prove to me that you learned it!” Repetition is important to achieving mastery!

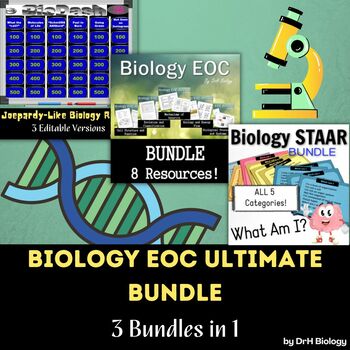
If you are a Texas teacher, the one thing not included in this supplemental bundle is all of my EOC review resources. These resources are very popular in my store. The most popular item is the bundle that contains reviews for all 5 categories plus has some bonus material. I’ve recently made a new item for reviewing the EOC’s that could be used in any biology classroom no matter where you teach. It came to me when I was playing a game with my family. I titled this activity, “What am I?” A student reads a clue while other students guess what the answer is. More clues are given until the students eventually get the answer. What a great way to review that’s fun and interactive.

Thanks for taking the time to check out all of this information. Teaching is a time consuming career. My hope is that I can save other teachers time and energy by providing them quality lessons and activities. I’d like to leave you with a freebie from my store as a thank you! Get your FREEBIE HERE: Genetics Practice Problem- Dihybrid Crosses

If you are interested in checking out my supplemental bundle in my store click here: Biology Curriculum Supplement: Bundle

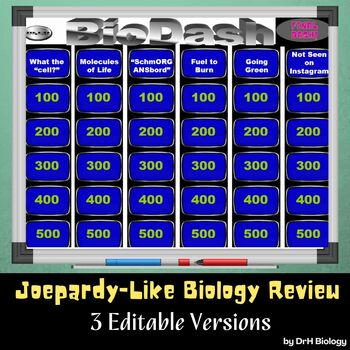
I’ve added a few more EOC resources since writing this post. You’ll see a Jeopardy-like Game and my Ultimate EOC Bundle which has several of the items mentioned above.

Quadrilateral Unit

Quadrilaterals are a big topic in geometry. There are so many things to know that it tends to get confusing for students. Students have misconceptions from their middle school math classes that are hard to overcome such as that a square is a square and only a square. A square is no way, no how a RECTANGLE! OH My!

I created a quadrilateral unit where I begin with a card sort activity. The cards have different shapes on them and the students are asked to separate them into parallelograms, trapezoids and other major shapes. This year, I decided that they should have a “for sure” pile and also make a “not sure” pile. I love listening to the conversations. Below is a pic of some slides I show:

The next thing that I like to do is discuss the Venn Diagram for Quadrilaterals. For some students, this is a breeze but for others, they are totally confused on why I’m using ovals in a diagram to represent groups of quadrilaterals. It’s best to make sure your students remember what a Venn Diagram is. I like to give an example of a region with math students overlapping a region of biology students to show that the overlap means all students taking both math and biology. Look at the Venn Diagram below. Can you figure out what quadrilaterals go in each region? Can some go in more than one spot?

This unit is the best place to use always, sometimes and never questions and if the students understand the Venn Diagram, then the always, sometimes and never questions are pretty obvious. It’s also a good time to talk about what does opposite and consecutive mean? Many of the definitions and properties use this terminology, so I spend time helping them understand where opposite sides and angles are versus consecutive sides and angles.

I like to get the kite and trapezoid out of the way first, so I can spend most of my time on the parallelograms. Students are not familiar with the kite, so this is usually a brand new topic for them. They think they know what a kite is but usually they are getting a rhombus confused with a kite. Each time I present a new quadrilateral, I give the definition and then we try to find other things that are always true about the shape. This is cool, because you get to talk about the diagonals and how they create congruent triangles. I also try to put proofs into the lesson as much as possible.

During the trapezoid part of the lesson, there is a discussion on isosceles trapezoids, midsegments of triangles and medians of trapezoids. A good reminder at this time is how trapezoids are related to parallel lines cut by a transversal, so that they can understand that there are some same side interiors that will be supplementary. Again, there is so much information, that its hard to know when to stop. Trapezoids could be a two week lesson if you let it, but I keep it to two pages. After the trapezoid lesson and the kite lesson, I give the students some practice on finding various parts of the shapes.

The rest of this unit is spent on parallelograms. Each time that I get to a new shape, I call it a “Parallelogram Study” or “Rectangle Study” etc. I let the students work through the definitions, properties and proofs. The other aspect of this lesson is discussing the coverses of the definitions and properties. This helps the students realize that if you see a shape and you are not sure what it is, then what is the least information you need to decide it is a rectangle for example.

The lesson concludes with practice on the parallelograms. There is a page of work where some major algebra topics are practiced. For instance, there is a rectangle problem where the students have to set up and solve a system. There is a rhombus problem where the students have to solve a quadratic. There is a square where the students find the length of the diagonal using the variable “s” for a side. This problem is a lead up to 45-45-90 triangles. I usually have to help the students with this whole page, but I don’t mind. Since I’m an Algebra II teacher as well, I like my geometry students to see as much algebra as time allows.

There is a set of task cards that act as a review for the Quadrilateral Test at the end of the unit. The test is only two pages long, but it is pretty involved. There is a major problem where the students have to find quite a few things. The picture of the problem is seen below:

Finally, there is another quick assessment that I use as a retest. All answer keys are included. It usually takes me about two weeks to get through all the work plus a couple of extra days to review and take the test. I love this unit. The information is extensive and I love how it hits on previous geometry and algebra topics. If you are interested, please check it out in my store. Click the pic below to go see the Quadrilateral Unit. If you would like to read more about my geometry curriculum, I have a blog post that you can read here: Geometry Curriculum for the Year.

Algebra – 2nd and 3rd Grading Periods – Moving Toward the STAAR!

This is a continuation of some of my earlier posts. I was so proud of my students last year for passing the Algebra STAAR, so I wrote about it here: How I Got a 100% Passing Rate on the Algebra EOC Part 1 and Part 2.

I promised that I would keep anyone interested up-to-date this year on my progress. I love doing this because I’m going to be able to look back and see where I want to improve after I get my results this year. Here’s my post on the first six weeks: First Six Weeks in Algebra I

I lumped the 2nd and 3rd 6 weeks together in one post because I have so many interruptions during this time. Every time I turn around there’s a field trip, a district benchmark, PSAT, TSI or other disruptions. My strategy has been to get through as much content as possible. I know my students very well at this point and I know who to keep an eye on.

The content that we’ve covered heavily is seen below:

I’ve pressed on and given lots of quizzes, tests and homework.

Some of my favorite activities have been some boom cards that I’ve made. The set of cards in the the resource below has 20 questions. Click here to go do the first four cards in the student view.

So far I haven’t pulled many questions of old STAAR test. Their minds were blown when I was explaining the recursive formula in arithmetic sequences. I did look back into old STAAR test to see how often sequences have been tested. The only question I could find from the the past three years was this problem from the 2017 released test:

In general, arithmetic (and geometric) sequences are not a big part of the test. The 2019 test did not have any questions on the topic. This question below is from the 2018 test:

I suspect that they rotate questions from the TEKS and that next year there will be at least one question like #22 or #9 above.

I wanted to start some recycling of the first six weeks through practice sheets like I did last year but life happens and I did not start this. (Side note: I’ve been teaching for 33 years. I always make plans to do this or that, but I’ve learned that I cannot always get to everything. Please don’t beat yourself up if you do this too. A lot of things in education and the school environment cannot be controlled. Don’t worry if you have visions of grandeur but it doesn’t always work out.) One thing I do feel good about is that I do not let the students use a calculator every day. They have to do math in their head. They did a lot of solving for y and manipulating formulas so they did get a taste of some of the things from the first six weeks which was mostly solving equations. Another thing I feel ok about is I know that I’m about to do systems which will also be good for practicing solving equations. We will also hit inequalities again through systems, so recycling information is going to happen naturally!

While on the topic of systems, if you are behind in your curriculum, this is a good time to try to catch up. Systems are important, but you can save solving for systems for after the STAAR test. Teach them how to set them up and solve them on the calculator for now. I hate this, but at the same time you have to make sure you cover all the material. Save solving systems algebraically for later if you need to.

I promised myself that I would make sure and have students explain the math they were using more. I wanted to know if they really understood how to solve for y and graph equations, so I made a flipgrid question when we got to solving and graphing inequalities. The students really enjoyed it and it was an eye opener for me. Students have a hard time with the vocabulary and I could tell who was bluffing their way through explaining the process.

The second semester has started and now it’s crunch time. I have to be deliberate in everything we do. We are starting with graphing and writing linear systems and then on to exponent rules. Check back to see what happens next!

This comes in a regular version too!

Geometry Curriculum for the Year

It took me a year and a half to complete my geometry curriculum, but I finally did it. I’m constantly updating and adding to it. I guess you could call it a living and growing curriculum. I’m using the curriculum myself, so I find things I want to update or make better all the time. I also take suggestions from teachers that are using the curriculum. Recently, I had a request to make all the quizzes and tests editable. With the changing times, it’s important to have multiple tests that cover the same topic so that you can limit cheating, differentiate or give make-up tests or re-tests. All tests and quizzes in the curriculum are indeed EDITABLE now!

(By the way, don’t forget to look for a special right triangle freebie at the bottom of this post!)

On the main page of my Geometry Curriculum on TpT, you will see every resource in the curriculum. I also sell each one of these resources separately in my store. A third way that I have the curriculum broken down is by units which I also sell in my store. Here is the first unit in the curriculum:

Why did I feel the need to write this curriculum? Many of my students come to me after taking Geometry over the summer. In my district, students have the opportunity to get ahead in math. If the student does not pass Geometry during the summer, they end up using the exact same curriculum again. They get to keep their book from the summer with all of the work already done. It doesn’t make sense. Also, it was very easy for students to find the answers on the internet for the book we used. It was time to figure out something and stay ahead of them.

I really like a hands-on curriculum. I use patty paper, compasses, protractors, tape and scissors on a regular basis. I also like to give Google Form tests as well as activities on Google Slides and Boom Cards. The resource cover above shows one of my favorite conditional statement activities. As you can see, we do lots of cutting and pasting.

Many of the activities are discovery lessons. I make sure there is plenty of algebra involved to keep these skills alive for the next math class. If you have any specific questions about this Geometry Curriculum, please leave a comment below, or ask a question in my TpT store.

Here is a freebie from one of my special right triangle lessons. CLICK HERE!

To read more about the units, I’m slowly but surely writing posts about them so teachers have a better understanding of what they contain.

Unit 1 – Diving Into the First Unit of Geometry Headfirst

Unit 2 – Two-Column Proofs and Reasoning

Unit 3 – Parallel Lines, Transversals, Perpendicular Lines

Unit 4 – Transformations

Unit 6 – Quadrilateral Unit

My final unit in the curriculum has been uploaded. It is a unit on probability which is part of the curriculum in Texas.

I’ve also recently made all of the tests and quizzes editable. If you purchase the curriculum, you will find them in each lesson. If you’d rather purchase this resources separately, click here: Editable Geometry Assessments.

You can find me on Instagram @time_flies_math . I like to show student work in action on my Instagram posts. Check it out if you have time. It will help you get a feel for some of the lessons. To see the curriculum in my TpT store, click the picture below.

As you were looking at the curriculum, you might have noticed that it contains Boom Cards. If you do not want Boom Cards, then click the pic below to get the version without them.

VERSION WITHOUT BOOM CARDS: