Quadrilaterals are a big topic in geometry. There are so many things to know that it tends to get confusing for students. Students have misconceptions from their middle school math classes that are hard to overcome such as that a square is a square and only a square. A square is no way, no how a RECTANGLE! OH My!
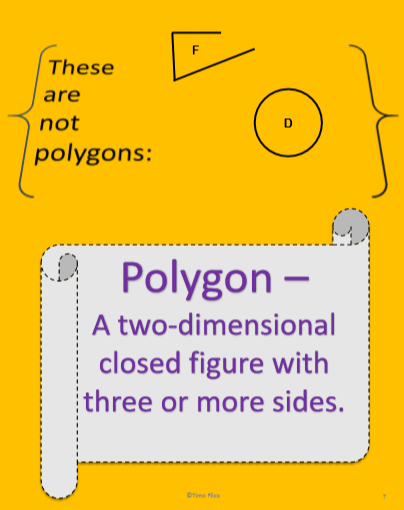
I created a quadrilateral unit where I begin with a card sort activity. The cards have different shapes on them and the students are asked to separate them into parallelograms, trapezoids and other major shapes. This year, I decided that they should have a “for sure” pile and also make a “not sure” pile. I love listening to the conversations. Below is a pic of some slides I show:

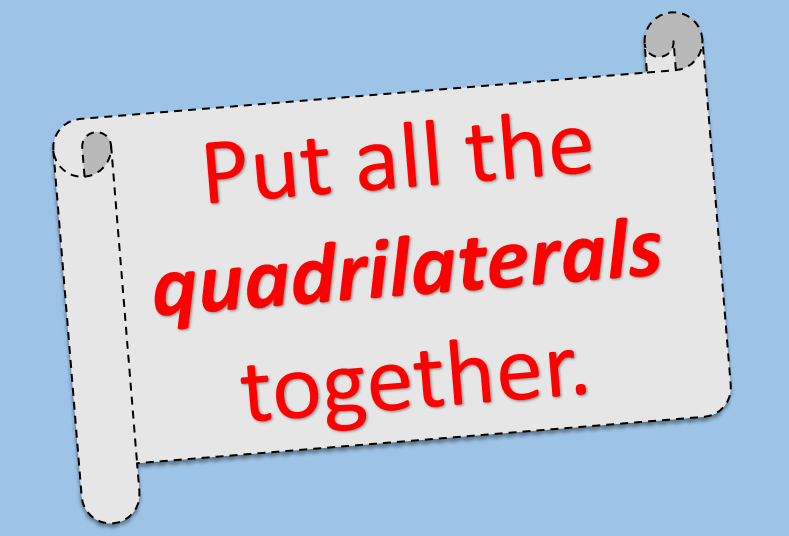

The next thing that I like to do is discuss the Venn Diagram for Quadrilaterals. For some students, this is a breeze but for others, they are totally confused on why I’m using ovals in a diagram to represent groups of quadrilaterals. It’s best to make sure your students remember what a Venn Diagram is. I like to give an example of a region with math students overlapping a region of biology students to show that the overlap means all students taking both math and biology. Look at the Venn Diagram below. Can you figure out what quadrilaterals go in each region? Can some go in more than one spot?

This unit is the best place to use always, sometimes and never questions and if the students understand the Venn Diagram, then the always, sometimes and never questions are pretty obvious. It’s also a good time to talk about what does opposite and consecutive mean? Many of the definitions and properties use this terminology, so I spend time helping them understand where opposite sides and angles are versus consecutive sides and angles.
I like to get the kite and trapezoid out of the way first, so I can spend most of my time on the parallelograms. Students are not familiar with the kite, so this is usually a brand new topic for them. They think they know what a kite is but usually they are getting a rhombus confused with a kite. Each time I present a new quadrilateral, I give the definition and then we try to find other things that are always true about the shape. This is cool, because you get to talk about the diagonals and how they create congruent triangles. I also try to put proofs into the lesson as much as possible.
During the trapezoid part of the lesson, there is a discussion on isosceles trapezoids, midsegments of triangles and medians of trapezoids. A good reminder at this time is how trapezoids are related to parallel lines cut by a transversal, so that they can understand that there are some same side interiors that will be supplementary. Again, there is so much information, that its hard to know when to stop. Trapezoids could be a two week lesson if you let it, but I keep it to two pages. After the trapezoid lesson and the kite lesson, I give the students some practice on finding various parts of the shapes.
The rest of this unit is spent on parallelograms. Each time that I get to a new shape, I call it a “Parallelogram Study” or “Rectangle Study” etc. I let the students work through the definitions, properties and proofs. The other aspect of this lesson is discussing the coverses of the definitions and properties. This helps the students realize that if you see a shape and you are not sure what it is, then what is the least information you need to decide it is a rectangle for example.
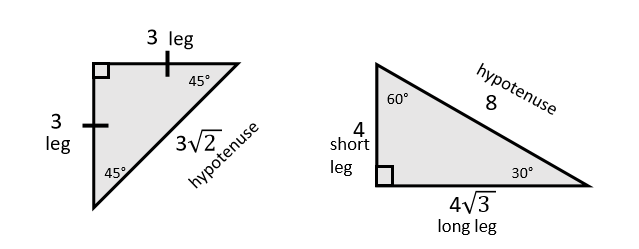
The lesson concludes with practice on the parallelograms. There is a page of work where some major algebra topics are practiced. For instance, there is a rectangle problem where the students have to set up and solve a system. There is a rhombus problem where the students have to solve a quadratic. There is a square where the students find the length of the diagonal using the variable “s” for a side. This problem is a lead up to 45-45-90 triangles. I usually have to help the students with this whole page, but I don’t mind. Since I’m an Algebra II teacher as well, I like my geometry students to see as much algebra as time allows.
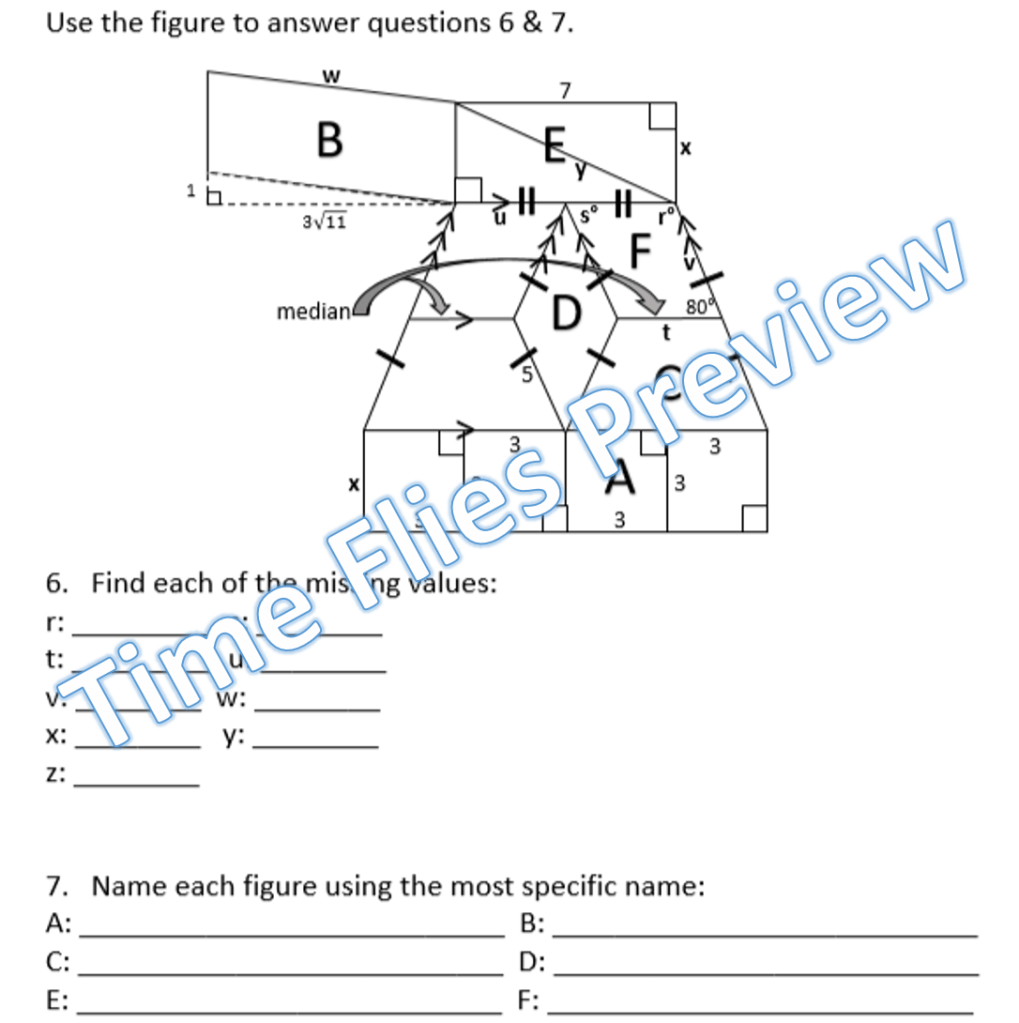
There is a set of task cards that act as a review for the Quadrilateral Test at the end of the unit. The test is only two pages long, but it is pretty involved. There is a major problem where the students have to find quite a few things. The picture of the problem is seen below:
Finally, there is another quick assessment that I use as a retest. All answer keys are included. It usually takes me about two weeks to get through all the work plus a couple of extra days to review and take the test. I love this unit. The information is extensive and I love how it hits on previous geometry and algebra topics. If you are interested, please check it out in my store. Click the pic below to go see the Quadrilateral Unit. If you would like to read more about my geometry curriculum, I have a blog post that you can read here: Geometry Curriculum for the Year.