This is a continuation of some of my earlier posts. I was so proud of my students last year for passing the Algebra STAAR, so I wrote about it here: How I Got a 100% Passing Rate on the Algebra EOC Part 1 and Part 2.
I promised that I would keep anyone interested up-to-date this year on my progress. I love doing this because I’m going to be able to look back and see where I want to improve after I get my results this year. Here’s my post on the first six weeks: First Six Weeks in Algebra I
I lumped the 2nd and 3rd 6 weeks together in one post because I have so many interruptions during this time. Every time I turn around there’s a field trip, a district benchmark, PSAT, TSI or other disruptions. My strategy has been to get through as much content as possible. I know my students very well at this point and I know who to keep an eye on.

The content that we’ve covered heavily is seen below:
- Slope
- Y-intercept
- Slope-intercept form
- Point-slope form
- Writing equation given different info
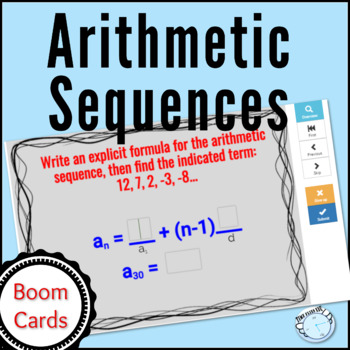
- Arithmetic sequences
- Direct variation
- Parallel and Perpendicular lines
- Just starting systems
I’ve pressed on and given lots of quizzes, tests and homework.
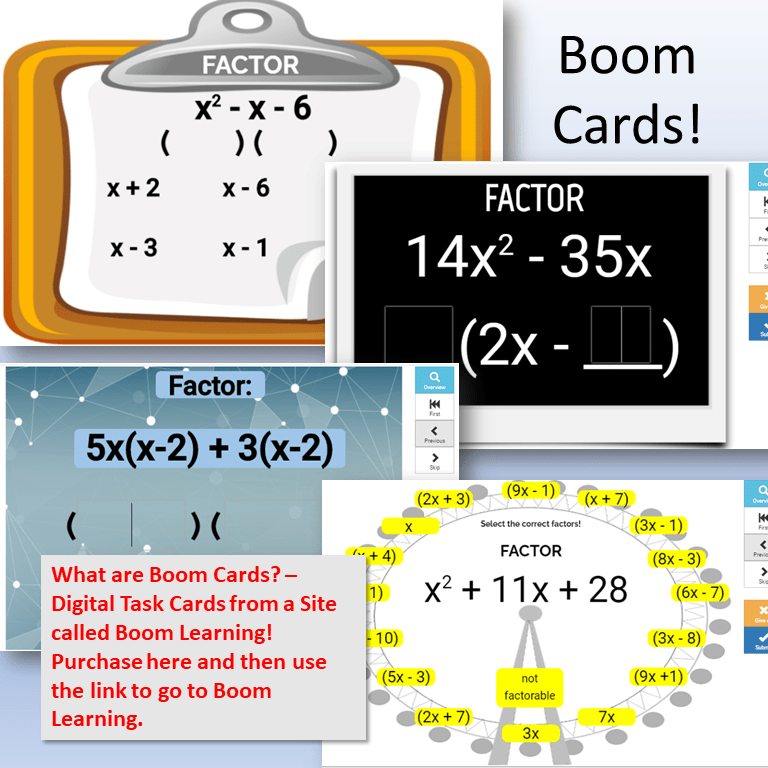
Some of my favorite activities have been some boom cards that I’ve made. The set of cards in the the resource below has 20 questions. Click here to go do the first four cards in the student view.

So far I haven’t pulled many questions of old STAAR test. Their minds were blown when I was explaining the recursive formula in arithmetic sequences. I did look back into old STAAR test to see how often sequences have been tested. The only question I could find from the the past three years was this problem from the 2017 released test:

In general, arithmetic (and geometric) sequences are not a big part of the test. The 2019 test did not have any questions on the topic. This question below is from the 2018 test:

I suspect that they rotate questions from the TEKS and that next year there will be at least one question like #22 or #9 above.
I wanted to start some recycling of the first six weeks through practice sheets like I did last year but life happens and I did not start this. (Side note: I’ve been teaching for 33 years. I always make plans to do this or that, but I’ve learned that I cannot always get to everything. Please don’t beat yourself up if you do this too. A lot of things in education and the school environment cannot be controlled. Don’t worry if you have visions of grandeur but it doesn’t always work out.) One thing I do feel good about is that I do not let the students use a calculator every day. They have to do math in their head. They did a lot of solving for y and manipulating formulas so they did get a taste of some of the things from the first six weeks which was mostly solving equations. Another thing I feel ok about is I know that I’m about to do systems which will also be good for practicing solving equations. We will also hit inequalities again through systems, so recycling information is going to happen naturally!
While on the topic of systems, if you are behind in your curriculum, this is a good time to try to catch up. Systems are important, but you can save solving for systems for after the STAAR test. Teach them how to set them up and solve them on the calculator for now. I hate this, but at the same time you have to make sure you cover all the material. Save solving systems algebraically for later if you need to.
I promised myself that I would make sure and have students explain the math they were using more. I wanted to know if they really understood how to solve for y and graph equations, so I made a flipgrid question when we got to solving and graphing inequalities. The students really enjoyed it and it was an eye opener for me. Students have a hard time with the vocabulary and I could tell who was bluffing their way through explaining the process.

The second semester has started and now it’s crunch time. I have to be deliberate in everything we do. We are starting with graphing and writing linear systems and then on to exponent rules. Check back to see what happens next!