Posted on — Leave a comment

Examples of Real-Life Arithmetic Sequences

One of my goals as a math teacher is to present real-life math every chance I get. It is not always easy, I have to admit. When I was in college and the earlier part of my teaching career, I was all about the math… not how I might could use it in real life. I’ve made it a goal of mine to find real-life situations. I’ve also tried to catch the situation in action, but it’s not always possible especially since sometimes I think of an idea while driving or when I’m falling asleep at night.

My recent thoughts have been about arithmetic sequences. Seems easy, right? They are linear. There are a ton of linear situations. Yes, but I want visuals! I also did not want the situation to be a direct variation or always positive numbers and always increasing or positive slopes.

Below are some of the situations I’ve come up with along with a picture. I’m happy for you to use these situations with your classes. When you are finished reading this post, please consider filling out this feedback form called: Understanding Our Visitors. Enjoy!

Stacking cups, chairs, bowls etc. (Stacking anything works, but the situations is different when one thing fits inside the other.) The idea is comparing the number of objects to the height of the object.

Pyramid-like patterns, where objects are increasing or decreasing in a constant manner. Ideas for this are seats in a stadium or an auditorium. A situation might be that seats in each row are decreasing by 4 from the previous row. I use this in one of my arithmetic sequence worksheets.

Filling something is another good example. The container can be empty or already have stuff in it. An example could be a sink being filled or a pool being filled. (Draining should also be considered!) The rate at which the object is being filled versus time would be the variables.

Seating around tables. Think about a restaurant. A square table fits 4 people. When two square tables are put together, now 6 people are seated. Put 3 square tables together and now 8 people are seated. I really love this example. You can use a rectangular table as well and start off with 6 seats.

Fencing and perimeter examples are always nice. Discuss how adding a fence panel to each side of a rectangular fence would change the perimeter. Figure one could have one panel on each side (or change it so it isn’t square). Figure two could have two panels on each side. Each time find the new perimeter. The possibilities for fencing are endless. But how fun would it be to get actual toy fence pieces and do this in your classroom?!

Even though this is not particularly a real-life situation, it’s still good because the visual is real life. The students can touch the objects or even create the pattern themselves! Use toothpicks, paperclips or even cereal to make patterns. If you’d rather set them up somewhere in the room for math centers, then that would be good too! The following is an idea with cereal. If you count total Froot Loops, it’s not arithmetic, so it’s best to stick with rows, perimeter, or sides of the triangle to stay with a linear pattern. (Counting all of them is an area problem, so that would make it quadratic.)

Negative number patterns are not as easy to find. Our thoughts usually go to temperature or sea level. There are some fascinating places on earth that are below sea level. I think it would be cool to do a study on some of them. Once you’ve talked about some of these places, then various situations could be created like, during a rainfall the surface of the water started at 215 feet below sea level and rose at a rate of such and such per hour.

Situations involving diving in the ocean could be used as well. Did you know that a diver should descend at a rate no faster than 66 feet per minute or ascend at a rate of no more than 30 feet per minute? I’m sure many students don’t know why and this could certainly create some great accountable talk.

I hope I’ve given you plenty to think about. It’s really fun to create these problems. Students need to know that their math is real and useful! I hope this encourages you to use some of these examples or make up some of your own. I’d love to hear some of your examples. Leave a comment if you’d like. We can all learn from each other!

——————————————————————————-

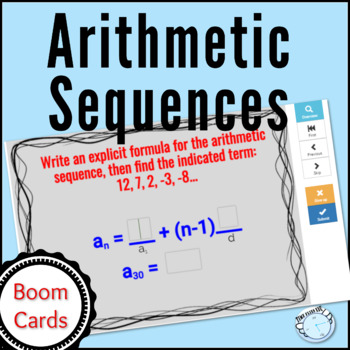
Some of the examples I used above are in my Arithmetic Sequence Activity seen below. When I was creating this resource, it really stretched my thinking. I wanted to create something that students could learn from and see how these patterns are involved in real-life situations. I’ve attached a couple more of my resources. I’m also have a Geometric Sequence Activity that you can go check out. The second resource below would be a great follow up after teaching arithmetic sequences. It’s a Boom Card Activity. The third resource is an arithmetic and geometric sequence and series game. It is really suited for Algebra 2. The resource at the bottom is a formula chart for geometric and arithmetic sequences and series. There are 10 different chart choices! Go take a look!

Posted on — Leave a comment

Algebra Christmas Worksheet

Several years ago, I wanted a fun Algebra worksheet that my students could do during December. I created the worksheet and we did it that year and then I changed schools and forgot about the worksheet. A friend of mine at the old school I was at sent me an email: Hey, can you send me that worksheet we did a couple of years ago that had the Christmas tree on it? I had to think for a minute…Where did I save that? I found it and made it even better and sent it to her. I was so glad I found it. As I was looking through the problems, I was thinking about how great this worksheet is right before the semester final. It’s got so much good stuff on it.

The topics covered are:

  • Knowing if a slope of a line is positive or negative.
  • Finding slope and y-intercept from equations and graphs.
  • Finding slope from two points.
  • Using different forms of equations: slope-intercept, point-slope, standard
  • Finding domain and range.
  • Graphing a line from an equation.
  • Writing an equation from a line on a graph.
  • Taking a problem situation and writing an equation, then graphing it.

I’m very pleased with all the material covered and I’m looking forward to this worksheet being a part of my semester final review. Here are a couple of pics from the front and back of the worksheet:

This worksheet comes with an answer key. Click the picture of the product below to go check it out in my store!

Posted on — Leave a comment

How I teach Factoring

Factoring is one of those skills that students must know how to do since they will use it in every high school math class. This skill is one of the most important skills and unfortunately some students never really get it. I hear calculus teachers complain about how their students can’t factor. Students should already know how to factor before entering calculus but why don’t they? Factoring will be in all the college entrance exams too because students need to know how factor for their college math classes. I know in Texas that students can know very little about factoring and still pass the Algebra EOC. Questions on the EOC can be figured out by working backwards from the answer choices. There usually is one question each year where students have to find one of the factors which does make it a tougher question. Students really do not learn how to really factor until Algebra 2.

When I was in high school the method that was taught was guess and check. We got pretty good at it but back then you knew your multiplication facts very well. When I first started teaching math, I honestly had no clue how to teach factoring. I’ve done every method or fad that came along but I have settled on a method after realizing that this is how it is taught in many college algebra classes. The method I use is GROUPING! I focus heavily on finding GCF’s and factoring by grouping and then when it’s time to factor the tough trinomial problems, we turn them into grouping problems.

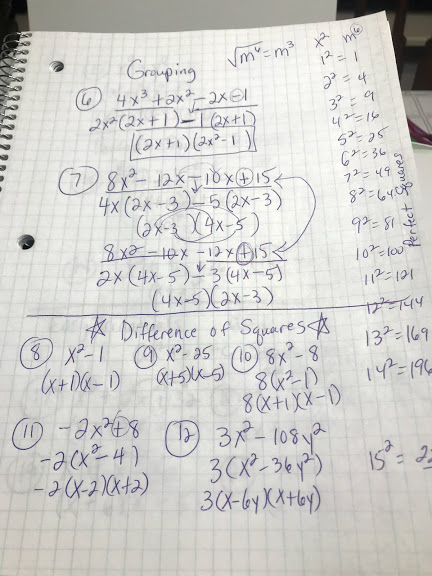
I start the factoring unit by teaching the students how to factor out a GCF. To help them understand, I’ll sometimes call it “undistributing”. Once they understand how to factor out a GCF, then I give the students grouping problems. They are taught to group the first two terms and the last two terms and then factor out a GCF. I tell them that if they get the same answer in both parenthesis then they have worked the problem correctly. They factor out the common parenthesis and make another parenthesis with the leftovers. Once they get good at this then I talk about differences of squares and perfect square trinomials.

These are my notes from my Algebra 2 classes this year:

Next I teach them to spot easy trinomials and hard trinomials. I later explain that they are problems that either have an “a” equal to one or an “a” greater or less than one. I discuss how the signs work in trinomials:

  • + + = ( + )( + )
  • – + = ( – )( – )
  • – – = ( – )( + ) the larger number gets the –
  • + – = ( – )( + ) the larger number gets the +

When I teach the a = 1 problems, I tell the students to go to the last number and ask, “What multiplies to get the last number that will add or subtract to get the middle term.” Students can do this pretty well…especially if they know their multiplication facts.

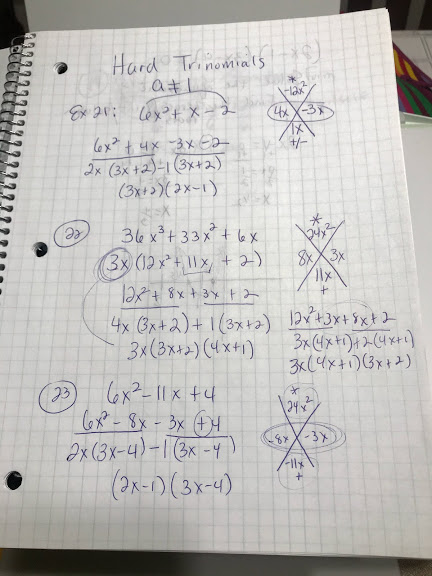
When I teach the hard trinomials (a>1 or <1), I have the students draw a big X to the side of the problem. The students are directed to multiply the first term and the last term in the trinomial. They write that at the top of the X. The middle term goes at the bottom of the X. Next, they ask that same question about what multiplies to get the top number that adds or subtracts to get the bottom number. The students write it on the left and right side of the X. Now it’s time to turn the problem into a grouping problem. The students are told to write the first term of the original problem, then the two monomials they just found and the last term of the original problem goes on the end. Factor by grouping and they are done.

I know students should know this by the time they are in Algebra 2, but many of them don’t. I usually try to break these notes up into two days. I assign Games 1 – 6 of my Factoring Using Seek and Find. I love this activity because the students know if their answers are correct or not by finding the answers in the puzzle.

A quick tip on helping students that aren’t good with their multiplication facts. If they want to know for instance what multiplies to give you 300 that would subtract to get 44…Have students type 300/x into a graph of a graphing calculator, then go to the table. The table contains all the factors. I tell them to ignore all decimals. They will see a 50 and a 6 in the x and y columns. They can reason that if they subtract, they can get 44.

Factoring is a very important concept and students need this skill to survive in their upper level math courses. I finally feel confident that my students understand it since I now stick with a certain way of presenting it to them. I truly believe in the way I teach factoring and I hope that I have given you some ideas on how best to help your students successfully learn this concept!

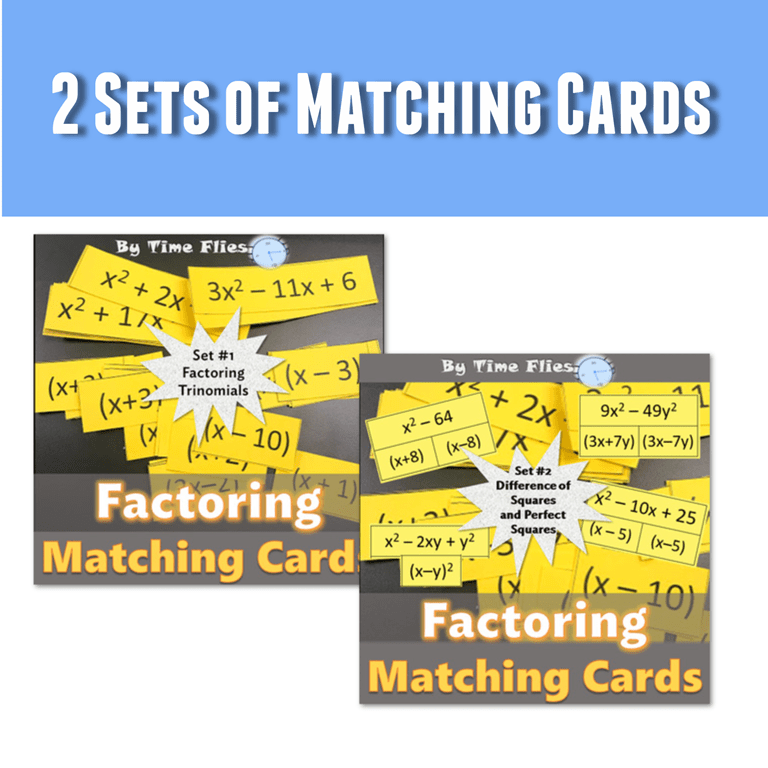
For my Algebra I classes, I made some factoring matching cards you might be interested in: Factoring Matching Cards #1 and Factoring Matching Cards #2.

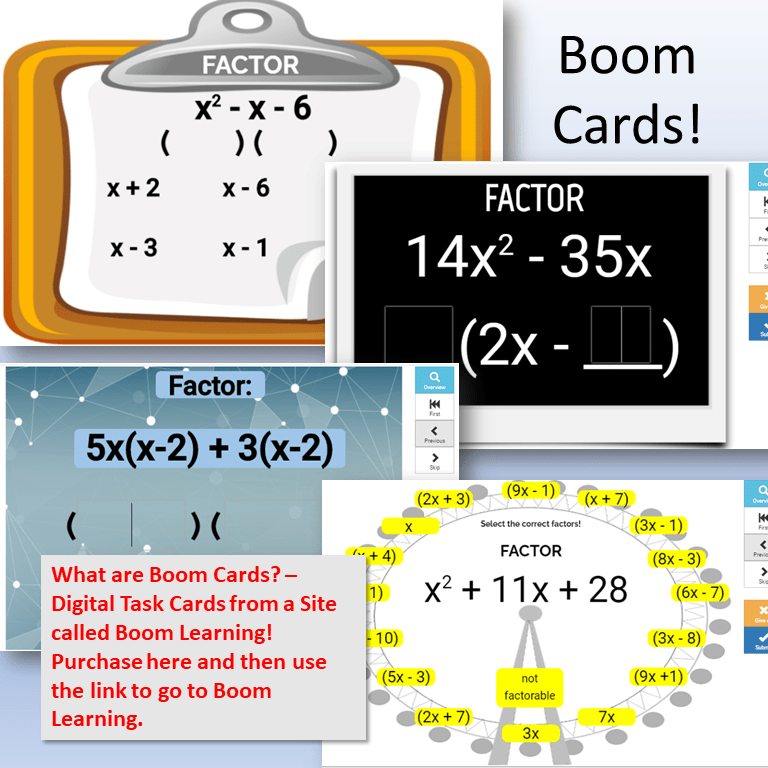
I also made 4 sets of Boom Cards. Boom Cards are awesome because you can have your students work through them as many times as they want until they understand. They are great for digital learning!

I finally have all of my factoring activities together in one bundle. You can never have too many factoring options. Factoring is a biggie and we all know how students tend to be weak in this area. The calculus teacher at my school is always telling me how students forget how to factor. This skill needs to constantly be recycled until it finally sticks!

Posted on — Leave a comment

9 Exponential Functions Activities That Are A Must!

I could do exponential functions all year. I really enjoy them and think they are super fun. When I got my master’s degree, I did a study on exponential functions. I learned so much and I found that I was really interested in them. I created this first lesson more than 10 years ago and have been using it ever since! Creating that first activity sparked me into creating more and experimenting with some other ideas. I’m excited to share with you my list of 9 Must Do Exponential Function Activities!

(1) Exponential Function Poster Activity:

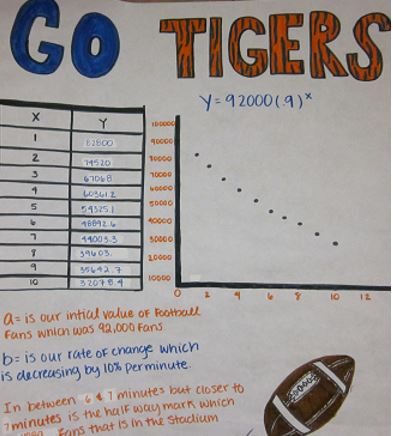
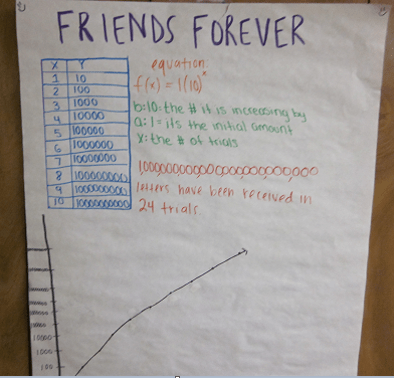
This is my very first exponential function activity that I ever created. It’s not the first lesson I teach when I’m starting this content, but it’s my favorite. This activity is the ultimate collaborative and differentiable activity. There are so many interesting exponential function situations! It’s been tried, tested and tweaked. Basically this lesson is a collaborative activity where the students are given an exponential scenario. The groups must create a multi-rep poster where they collect data, draw a graph, write an equation and answer a question.

The lesson opener is a bacteria problem. I want every student to get a feel of how they should work through one of these scenarios. The bacteria problem talks about what bacteria are and how they can multiply very quickly. I help the students go through the multi-representations to make sure they know what is expected of them when they start their poster.

Next, I show them their choices which are:

  • A Chain Letter Problem
  • A Zombie Situation
  • A Tournament Bracket
  • A College Football Situation
  • Making Friendship Bread
  • A Lovely Cockroach Scenario

Every situation usually gets chosen. You can entice students to create their own situation too. The college football situation was a student idea from years ago that I have improved upon to make it work better. Your students are amazing and creative, so don’t think that they wouldn’t be able to make up a situation of their own. The student of mine that created the football problem was not one of my top students, but because he was the one that thought of the scenario, he was interested and did a great job of completing the task.

After the bacteria problem, I turn the students loose and let them start their work. They are told to be creative and display the information in a way that is interesting and pleasing. I tell them to title the poster and make sure every person in the group writes on the poster. I supply the poster paper, the markers and the scenario sheets.

I’ve learned to watch out for misconceptions. Some students when creating graphs, will take the exact y-values and place those numbers on the y-axis. Here is an example below that I didn’t catch until it was too late. I cringe when I see this! (Not a very creative poster either…ugh!)

Once the posters have been created, it’s time for the Gallery Walk! I want the students to check out at least 4 posters. I’ve created a page that students fill in while looking at the posters. They have to write the title of the poster, determine the domain and range, decide if the situation is growth or decay and then write down one thing they may wonder about the situation. The conversations that I hear are amazing. They love getting to look at the other posters and they love to critique them as well.

I’ve had feedback from teachers that have taken my activity and changed it to fit their needs. One teacher used a speed dating strategy where the students worked through a problem on their own and became the expert. The possibilities are endless. Each teacher has their own unique way of teaching and their own unique classroom situation. If you have a group of rowdy kids that you don’t want up running around, then let them do their own problem on notebook paper or graph paper. You could even let them create the table and graph in excel and present the problem in a PowerPoint.

Check out this activity in my store: Exponential Functions Activity

(2) Exponential Function Activity in Google Slides Form

Out of necessity last year, I created a Google Sides version of the lesson above. I’m having a hard time deciding which one to use this year. Instead of making posters, the students create the table, graph and equation in Google Slides. This doesn’t sound very exciting except that my whole class was in the same Google Slides all working at the same time. I was 2000 miles away monitoring the activity. They asked me questions and I could see them working in real time. I loved it so much that I’m honestly going to have a hard time deciding what I should use. Maybe I’ll let one class do the posters and one class do the digital form and compare the two. If you are big into digital resources you will love this. I now have this version in my TpT store: Google Slides Exponential Functions Activity. Below is one of the slides that I graded. Looking at this now, I should have asked the students if this situation was discrete or continuous.

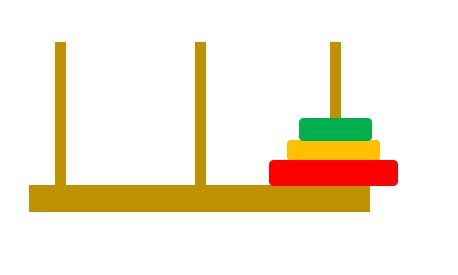
(3) Tower of Hanoi

Find a Tower of Hanoi game on the internet or have the students download an app on their phone. The object of the game is to move the discs from one stack to another stack in the least amount of moves. You can never put a larger disc on top of a smaller one. The number of discs and the least number of moves is an exponential function. It’s fun to let the students play a while and get them to create a table of the number of discs and the least number of moves and then see if they can figure out the exponential function.

(4) Twizzler Decay Activity

Tasty and fun. This is a freebie I’d like to share with you! I love using this as a quick lesson opener. Students measure a Twizzler and jot down the data in a chart. The student folds the Twizzler in 1/2, cuts it and measures it. Each time the student continues this step until there is not enough Twizzler left to work with. They plot the table and then lots of discussions can take place about decay or even the concept of half-life. Click Here for the Freebie: Exponential Function Twizzler Freebie

(5) Exponential Function Unit

This is the first thing I start with when I introduce Exponential Functions in Algebra 2. I refuse to stand up and lecture over this topic so I let the students work through this unit at their own pace. I copy the pages as a booklet. Students can use a calculator and even partner up if they want to work with someone. I let them work through the unit and figure out most of the information by graphing and using the information that they have already learned earlier in the year about transformations and domain and range. I do have to talk about asymptotes because we have not discussed this concept much up to this point. I teach on a block schedule and it takes most students a good 2 class periods to get this packet done. Topics covered are transformations, e, compound interest, 1/2 life, growth, decay, domain, range, y-intercepts, asymptotes, an inverse problem, writing equations from tables, growth and decay model scenarios, a paper folding activity, assessments and bell ringers and lesson closers. There’s a ton of information. I usually get the students to trade and grade after all is said and done. I feel like they learn a lot by working through this on their own. Students need to see that they can work on their own and figure things out. If you are interested, click the link: Exponential Functions Unit.

(6) Exponential Function Task Cards

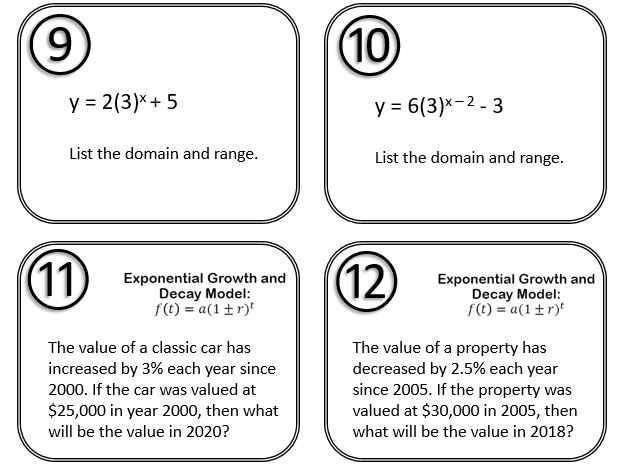
I have a set of 20 Exponential Functions Task Cards. For some reasons, students do very well with task cards. If you put these same 20 questions on a worksheet, some students will be bored or are overwhelmed with thinking about doing a 20 question worksheet and they will give up. Take the same 20 questions and put one on a card, now they will sit there and work through them. It’s amazing! This set of task cards would be a great review right before an assessment. The task cards cover recognizing growth and decay from an equation, transformations, key features of graphs, the growth and decay model and compound interest.

(7) Sierpenski’s Triangle

How do you get all of these activities done? Part of my strategy is to do them in stations. Really math labs or centers would be more accurate. It would be hard to time these stations and expect students to be completely finished with each task. The Sierpenski Triangle activity, the Tower of Hanoi and several more exponential phenomena are discovered and tinkered with during my Exponential Stations Resource.

I love the Sierpinski Triangle activity because not only do the students create beautiful art work, they have to collect data on the number of shaded or unshaded triangles. We then put all of the triangles together to make a giant Sierpinski Triangle!

(8) Compound Interest Study

Students are told that they have inherited some money but to receive it, they must follow some rules. Every student in the class will probably end up with a different situation. Each student gets 4 cards that tell them how much money they inherited, how long they have to invest it and 2 different compounding options to compare. They work through their problem and then share their information. This study sparks lots of good conversations and helps the students realize that compounding doesn’t make much difference but time invested does make a difference! Get the Compound Interest Study Here!

(9) Marble Slides Exponential Function Desmos Activity

If you aren’t using the Desmos Graphing Resources, you need to start. I love the Marble Slides Activities and so do the students. There are several Marble Slides Activities for various functions. The object is to change the equations so that when the marbles are dropped, they travel the correct route and hit all of the stars which means success. Students learn how to manipulate the equations so that the marbles do just what they want. Very fun and engaging!

So there you have it! If you can get most of these activities and lessons done, then your students will know tons of awesome math content. I have all of these activities bundled (except for the google slides activity) into one package for 20% off. If you are intersted, then click on the pic below. If there is something that you can’t find, please let me know. I’d love to add things that teachers are looking for. Thanks for visiting this article.

Happy Teaching…

Posted on — Leave a comment

Getting Ready for the October PSAT Math Portion

If you teach a sophomore or junior level math class, then you know in October each year the juniors take the PSAT/NMSQT and the sophomores take the PSAT 10. Although these are both preliminary scholastic aptitude tests, they are important for students. Not only could students receive scholarships if they do well on the assessments, but students can see where they stand in their college readiness skills.

What is the role of the educator in all of this? We are here to help our students be prepared! Yes, on a daily basis we are teaching content and skills that are tested, but when is the last time you looked at a PSAT or SAT? Some questions on these tests are straight forward, but others are not. It will help your students if you are aware of what types of questions will be asked and how they will be asked.

The math content on the test is broken down like this:

3 Main Areas (Chosen because they appear in many college majors and careers)

  • Heart of Algebra (Linear equations and systems)
  • Problem Solving and Data Analysis (Using data, statistics and numeracy to solve and analyze problems)
  • Passport to Advanced Math (Manipulating complex equations)

A 4th area that can also show up on the test is Geometry and Trigonometry. College Board does not put these with the main areas for some reason, so I’m assuming it does not appear as often or isn’t the main focus.

To prepare our students, not only do we want to review the necessary content, but we should prepare them by using calculator and non calculator practice. We can also time our students because all the tests are timed on the PSAT.

The math test is broken into a 25 minute no calculator portion with 17 questions. Four of those questions are grid questions. The 2nd math portion where the students can use a calculator is a 45 minute test with 31 questions and 4 of those are grid questions.

I have created many different practices for taking the PSAT and SAT. One of my favorites that I think would be useful to students is a practice that can be broken into a 5 week plan and used as bell ringers. The topics covered are: Systems, Quadratic Factoring and Solutions, Simplifying Radicals, Polynomials, Measures of Central Tendency, Slope, Distance, Inequalities, Parallel Lines and Transversals, Area of Circles and Triangles, Volume, Special Right Triangles, and Setting Up and Solving Equations.

The worksheets are layed out where the front side is just like the back of the worksheet. The front is practiced with the help of the teacher and students, but the back is done independently and is timed. How much better do you think your students would do if they had this kind of practice for several weeks before the test?

If you would like to see this for yourself, click the product picture below to check it out in my store.

Even if you don’t use my products, please find ways to help your students become familiar with the test. Start having conversations with your classes about how important it is to do well on theses tests. Encourage your students to seek information on prospective colleges and find out what the required SAT scores are for admission. I found a chart with score ranges for 360 colleges. It was written in 2016 but was updated last year. Good luck! May your students do awesome on the upcoming college readiness tests!

Posted on — Leave a comment

How I Got a 100% Passing Rate on the Algebra EOC – Part 2

You are reading the second part of this post. If you missed Part 1, click here to go read it first. Part 1 took us through the first semester of the 2018-2019 school year.

When I came back from the Christmas break, I was concerned about getting through my curriculum. We were behind and I knew that I needed to go strong. I made a calendar of what I needed to get done. I also wanted to give myself a two week review window.

Step 6: After the first semester, set up a calendar of everything you need to finish. Your deadline needs to be two weeks before the EOC.

My lessons were very focused. Just as I said in Post 1, the TEKS were continually studied so that I knew what was expected and how questions on each skill had been asked on past EOC’s. Every quiz and test either had actual EOC questions or resembled them closely. I layed out everything that I knew I needed to finish. I felt better about having a plan.

During the 4th six weeks, I set up lunch tutoring with my lowest students. Remember me saying that I thought about 70% would pass? Really my number was 67% because out of 15 students, I knew 5 of them would pass, I was not sure about the middle 5 and then the last 5…I thought would never pass no matter what I did. Sounds negative I know, but I’m telling you the real thoughts that I had!

I took the bottom 6 and split them up into two groups of three. I met them on Tuesdays and Thursdays during lunch. Why lunch? Because I knew it would be hard to get them to come after school. I gave them the 2017 EOC/STAAR and we started working through the problems. I let them use calculators because I wanted to show them everything I could to help them pass. I’d give them a few problems to work and then I’d go over it with them. I let their tutoring time count as extra credit or I’d replace missing grades. Did they always show up? No. Sometimes I’d go into the cafeteria and find them and make them come to my room. Sometimes I’d let it slide. I didn’t always have the energy to fight the battle.

Step 7: Set up tutoring with your lowest students at least once a week.

The 5th six weeks was crazy. I had to miss two weeks of school to go be with a family member. Thank goodness for Google Forms and Slides. I continued wrapping up the curriculum by sending my students the work through Google Apps. One thing that has saved me over the past few years is having a classroom blog. The students know to go to my blog to get assignments and class information. I was able to post all the links on my blog and we didn’t miss a beat. I had a really good sub that made sure students were doing their work. I kept in close contact with the students and would email them like crazy if I heard they weren’t doing their work. The two weeks that I was gone, I covered exponential functions and geometric sequences. This took us up to Spring Break.

After Spring Break, the district gave a Practice Algebra EOC. It was created by the district but it was very similar to the 2017 Test. It took a day away from class, but in the long run, it gave me very good data.

Step 8: Give a Practice EOC after Spring Break. It could be one of the actual tests. If you plan on doing this, then don’t use any of those questions on tests or quizzes.

Here are the scores. This shows how many questions were answered correctly. One of my students did not return after Spring Break, so I’m down to 14 people at this point. The benchmark actually made me feel so much better. I knew that to pass, they would need to get 21 or so questions correct. The 5 lowest scores had to continue tutoring. (It was the same people that were already attending tutoring. The 6th person was the one that did not return.) I was very worried about the two that scored 16 and 17, but I had not even covered quadratics yet and this test covered everything.

I’ll come back to how I used this data later. As for now, I want to tell you what I did at the very end of the 5th six weeks. (I did manage to get polynomials done and I taught the students how to multiply binomials but the next part is key for the next six weeks!) I gave every student a set of 40 flashcards covering the basics. They cut them out, punched holes in them and put them on rings. I gave them the answers and they wrote the answers on the back. Once it was all done, I gave them a 100. I told them to start studying them and bring them to every class.

Now I’m in the 6th 6 Weeks and I’m getting very close to test time. I’m three weeks from the test. There is no way to get quadratics done in a week, so I knew it would have to take two weeks and I would only have one week to review, but I started incorporating some quick review at the beginning of class. I would give the students 5 minutes to study their flashcards when they came into the room, then I would give them a quick 20 question quiz. It really was quick. I made the quizzes so that they could be answered quickly. The kicker was that the students had to make an 80 or better before they could move on to the next quiz. There were three quizzes in all. They were easy to grade and I got them back to them usually during the same class. I feel like this was a major confidence booster and it was good because they were seeing the same material over and over because each quiz had the same questions, just asked in a different way. This is how I started every class during this two week time frame. Remember, I teach on a block schedule.

Step 9: Give out flashcards and start taking the quizzes – three weeks out from the test.

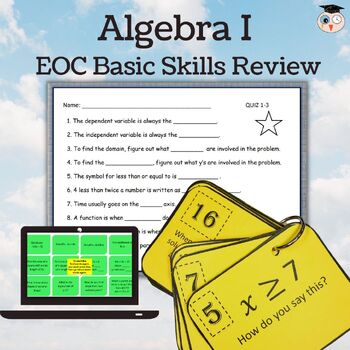
Let me tell you more about the flashcards and quizzes. I took a resource that I have on TpT called Algebra I STAAR/EOC Review Task Cards and Quizzes. Instead of using the Task Cards as I intended, I made them flashcards. The kids did all the work. I just printed them off. I gave them the answer key because I didn’t want them studying the wrong thing. I truly believe that this made a huge difference…especially for the low students. They need this repetition. It was nice for them because they had something specific to study. The quizzes should have been easy if they studied the cards. Most kids made an 80 or better on the first two quizzes, but time became an issue and I had to tell students that if they wanted to keep trying to make an 80, they would have to come during lunch to finish and not everyone did.

Finally, the last week before the test has arrived. I’ve wrapped up the curriculum as well as I could. The quizzes are mostly done. The Monday of the last week was my Algebra Camp Day. I took my 14 kids to a different part of the building where we would not be disturbed all day long and we worked on some specific tasks. The benchmark data from after Spring Break is how I decided on the specific tasks. Luckily, I had already created an EOC review a couple of years ago. I used bits and pieces of the objectives that I needed. I also changed some of it up to fit my needs that day. I started using some of these materials earlier in the year as needed, but it was good to have things already made that I could use. Camp Day was a success but very tiring. By the end of the day, they were sick of math and so was I, but they all said it was very worth it. I did enjoy it, but it took a lot of energy and time to get it set up. I have all my materials that I made and I will make it a goal of mine to share with you each thing I did in a new post, but for now if you want my EOC Objective Reviews, you can get them at my TpT store. By the way, it has 11 resources plus the Task Card and Quiz review that I mentioned earlier. You can buy only the objectives you want or get them bundled into one comprehensive review.

Step 10: Algebra EOC Camp Day! If you can’t do a full day, at least to a half day!

The last few days that I had in class with them were spent on going over the formula chart and giving them calculator tips. The very last time that I saw them was chaotic. I remember thinking that they weren’t listening, they were off task and they were just all over the place. I couldn’t believe that they weren’t totally focused, but I probably burned them out. I was very intense with them. They knew I meant business. I did not leave feeling good about the last class that I had with them.

All went well on test day though. My ELL students took the test on the computer and everyone else took the paper version. They all passed. I was elated. Here is a side by side of their benchmark scores and their actual test scores.

Benchmark VS. EOC

Let’s recap:

Step 6: Create a calendar plan for the second semester.

Step 7: Set up a tutoring plan with your lowest students. Start going over a previous STAAR test.

Step 8: Give a practice EOC close to Spring Break.

Step 9: Create flashcards and start taking quizzes

Step 10: Algebra Camp – one day or a half day.

Posted on — Leave a comment

How I got a 100% Passing Rate on the Algebra EOC – Part 1

7th periodFirst of all, let me say that I was sweating it! I seriously thought I’d have a 70% passing rate if I’m being honest. I saw so many weaknesses in my student’s math abilities. They did not come equipped with what they needed to say the least. It had been 3 years since I taught Algebra and I was excited until I finally figured out what a challenge this class would be! So here goes. I’m going to tell you exactly what I did. I’m doing this for y’all but I’m doing this for me as well. I’m starting fresh with a new group and I’m going to follow these steps and try to improve on them.

I would say it was a good three weeks before I got it in gear and realized what I was faced with. One of the first lessons I did was a review and a Pre-Algebra bingo game. After the review, we were ready to play. Well into the game, I kept wondering why no one had “bingoed” (is that even a word?). I kept thinking… any minute there will be a bingo. NO! It never happened and we ran out of time. This stayed in my head and I was baffled. Another clue that things weren’t right is that I had to give some preliminary tests for my district. For several of my students, it took three class periods and one of the kids never finished! I kept noticing that she was trying to get me to help her on just about every problem!

So what did I do?

Step 1: I looked at my student’s testing data from 3rd grade through 8th grade. 

Oh my goodness was it an eye-opener. The student that did not finish the district test had never passed a math STAAR test, EVER! Another student failed the 4th grade. Many of the students passed the 8th grade math STAAR but it was on the 3rd try! You may be saying, “What’s the big deal? This is my class every year.” I’ve been there too, at previous schools but I teach at an Early College High School now! I was not expecting this but really at an ECHS, there may be a little more motivation to succeed, but they are not much different from regular high school students.

*This year, I will do the data analysis earlier and I will know so much more! (I’m also not doing the district test that wasted so much time that did not ever get looked at again!)

So now what? I knew that they had learning gaps but I also knew I had to move on in the curriculum.

Step 2: No calculators for as long as I could stand it.

I’m not sure when we finally used calculators but I believe I brought them out after I made sure they could graph without a calculator. I know from the past, kids pick up on calculators fast so some of the things I wanted to show them could wait.

Why no calculators? The students needed practice on integer and rational operations. When we solved equations, it killed me to watch how long it took them to figure out the basic operations but I stuck with my plan. To scaffold before a lesson, I would do bell ringers that led up to the lesson…anything I knew they would struggle with due to the learning gaps. PLEASE, FOR THEIR FUTURE MATH CLASSES, DO NOT TEACH YOUR STUDENTS HOW TO USE N-SOLVE EARLY IN THE YEAR! You know what I’m talking about if you use the TI-Nspire!

Oh by the way, I had one student that would finish everything early because she actually knew what was going on. I started anticipating this and let her move ahead, help others or work on deepening her knowledge. *Looking back, I should have made her work on TSI material which is how I will improve on this type of student this year.

The first 6 weeks made me very nervous. I was trying to stay on pace with the curriculum, so I had to completely skip solving inequalities with keeping in mind, I would have to throw that in at some point! I did put it in right before graphing inequalities. I think I only spent a day on it, so I knew that it would need to be part of my EOC review before the test.

Before the 2nd 6 Weeks started, I studied the Algebra TEKS (objectives). What does the state of Texas expect from these algebra kids? If you have not looked at the TEKS over and over, I suggest you start.

Step 3: Study the Algebra TEKS and past Algebra EOC’s. How do they ask questions? What has been the trend over the past few years? Start adding these questions to your tests and quizzes. 

I decided that I would start incorporating questions from past EOC’s on my tests and quizzes. After every test and quiz, I would go back and look at the questions with the students and tell them that these were the questions that last year’s kids had to know. I did this consistently and the kids started becoming interested in this. They felt good when they got the questions correct. I also kept telling them to always aim to score a 70 or better on every test or quiz, even though this is higher than they have to make on the EOC.

In the second six weeks, I started recycling information from the first six weeks. I gave them three practice sheets that were only 1 page long. I always have visions of grandeur and of course wanted to give them a worksheet each week, but if you have taught Algebra I, you know that it’s like pulling teeth to get things turned in, so I tried not to fight it and just do as well as I could. I had one person that never turned in any of them, so their loss! Ok, yes that is what I’d like to think but I did offer tutoring after school and if students needed help, they could come in and I would help them. This student never showed even after parent phone calls.

Did I feel better after the second six weeks? No! I kept begging my principal to double block the students or at least do it the second semester, but he never did. (Yes, we are on a block schedule. I saw these students on Tuesday and Thursday for 1 hour and 25 minutes and then on Friday’s for 35 minutes.)

Here is how the students scored on the 2nd 6 Weeks Test:

Gradebook

Yep. Only one person passed. The one with the 27 is the girl that never turned in a practice sheet. Yes, I only had 15 students in Algebra I, but I was teaching Algebra II and Geometry as well with only one conference period every other day. I had a total of 150 students. My hands were full!

Here’s the deal. I’m a problem solver! I never give up and I will keep trying and fighting for my students and what is right. I did take off more days this year than ever before though because of stress and life. I’m retiring in two years and I have a lot of days built up that I need to use. Does this make me a slacker? No! How did I build up all those days? From being DEDICATED! But now I have a married child in nursing school that lives 2000 miles away that I want to go see as much as possible, so I’m doing it. I also have another college-aged kid that I want to spend as much time with as possible because he is about to move out. I’m going to be an empty nester, so family time is so important! I’m saying this because I don’t want teachers to thing that you need to kill yourself doing your job. You are one person and you can only do so much and that is good enough!

Enough of my tangent! I did not give up on these kids after their poor performance. Technically, I could look at the scores and say, “Hey look at how many scored better than a 40! … that’s about the target score of the EOC”…ugh. I had to do something though about poor test scores, so here’s the next part!

Step 4: Students had to come to two tutoring sessions to make up a test. The first session had to be to go over the missed problems even though I would do this a lot in class. The second session, they took a make-up test that they could only get a 70% as the highest possible grade.
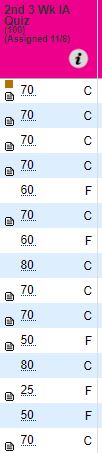
gradebook 1This was my policy from the beginning of the year, but I got too careless with it. I can’t force them to show, but I strongly encouraged them after this second six weeks. Some of the kids were great about coming in and others not so much. I started offering lunch tutoring to give them another opportunity to get help while at school. I let them eat in my class because I had to eat too. I did not offer this every day for my sanity, but only on Tuesdays and Thursdays, which was right after that class! Retesting is a pain, but I believe in it. How else will students learn from their mistakes? If they never look at a test and see what they missed, they will not grow and improve. It’s also good for me to see on an individual basis what their weak areas are and to give them one-on-one help. As you can see to the left, I document if they retested by putting a comment by the score.

My concentration during the 3rd six weeks besides retesting was making students talk about the math they were doing. I was doing a study on math discourse, so I was kind of forced to work on it. You would think after 32 years of teaching, that math discourse would be a big part of my teaching. I thought it was until I started this study. Desmos is a great tool for this as well as Flipgrid. In Desmos, there are lessons called Polygraphs. Students have to describe things to play the game and figure out the graph that the other student is thinking of. If you don’t have computer access for your students, you could totally create a similar game. One student picks a graph and the other person can only ask yes/no questions to figure out which graph was selected. You try to figure it out in as few questions as possible but students need to use math vocabulary! Both students have to understand the concept.

Flipgrid is another animal! It is an app or website where the teacher can ask a question and the student has to video their response. Wow, can I just say this showed me again how the students did not know the correct vocabulary or how to really explain what I asked. I used this several times, but the first time was when I asked them to explain how to graph a line that was in standard form. I felt like this deepened their understanding because I let them work alone to figure out what to say. They used a dry erase board to demonstrate as they were explaining. I loved this so much and I know it helped. Solving for y was a major ordeal, and I feel like most of them understand that as well as where the slope and y-intercept are in the equation and how to use them to graph.

I tried the rest of the year to use Desmos, Flipgrid, Quiz-Quiz-Trade, Collaboration Groups, Reflections and as much talk and explaining about the math that I could think of.

Step 5: Math Discourse is a Biggie, Folks! If you don’t do this, START NOW! I’m stupid for not using these things consistently in the past.

This takes us to the end of the first semester. I will continue this post in Part 2. Let all of this sink in for a while. Let the wheels turn. What can you change? 

Here’s a breakdown of what I suggest you do so far:

  1. Look at student data from their past math scores on the EOC and even their previous math classes.
  2. Don’t use calculators until you can’t stand it anymore or when it becomes really necessary!
  3. Study the Algebra TEKS and the Algebra EOC’s and start adding these questions to your tests and quizzes, then go over them consistently after the test/quiz.
  4. Allow the students to retest, but make them review the material first!
  5. Use Math Discourse as much as possible. Incorporate it daily or at least weekly. 

Go to Part 2!

Posted on — Leave a comment

College Readiness in Math

Math Test Prep (8)High School teachers have an obligation to prepare students for college. It’s sometimes tough to remember that. We tend to get caught up in teaching our subject and it ends there. It’s not easy to think beyond that but we must. I was working on a geometry lesson a few weeks ago and kept thinking about how awesome the lesson is. It isn’t awesome because I wrote it but because of how much algebra and geometry it has in it. In some lessons you get so focused on one thing and just keep repeating that thing over and over. This particular lesson has so many concepts and review of algebra. A lesson like this can be used as a review for things students should already know in a precalc class, a calc class or a college test prep class. How awesome would it be to review all of the following in one lesson:

  • Writing equations of lines
  • Finding distance, midpoint and slope
  • Finding slopes of perpendicular lines
  • Refresh terms like parallel, perpendicular, bisect, obtuse, acute, altitude, vertex, circumscribe, inscribe
  • Plotting points and coordinate plane work
  • Drawing all types of triangles

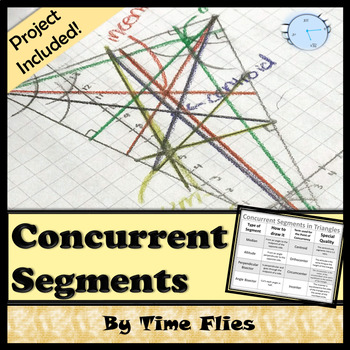
The resource is called Concurrent Segments in Triangles. The technical work leading up to finding these points of concurrency is all of the amazing review concepts above. I was thinking that I could take this lesson and break it into parts and use it when I review for the PSAT, SAT, ACT, ACCUPLACER or the TSI. My school is on a modified block schedule. I see all my classes on Fridays and there are lots of interruptions. I’ve turned Fridays into test prep days. I can use the concurrent segment lesson and make it last six weeks! I’m not going to get caught up in the terminology used such as orthocenter, incenter and such. I’m going to focus on the awesome math involved. Not many lessons have so much good math. Can’t wait to start this!Concurrent Seg

Check out this bundle full of college ready resources:

CR Bundle Cubed


Posted on — Leave a comment

Sierpinski’s Triangle

close up photo of green fern leaf
Photo by Tausif Hossain on Pexels.com

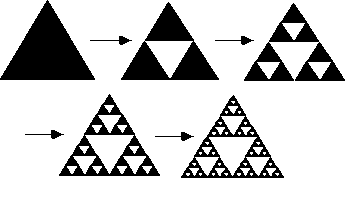
What do ferns, snowflakes, seashells and broccoli have in common? They are all fractals, of course! Fractals are fascinating and they are a great way to add some spice to your exponential functions unit. Have I told you how much I love exponential functions lately? I have a ton of exponential functions resources in my TpT store. In the Exponential Functions Stations Resource, I have a Sierpinski’s Triangle activity. What a great way to mix Art, Geometry and Algebra! The Sierpinski Triangle is an example of a fractal and an exponential function. I love the fact that so many real life objects can be examined through fractals and exponential functions.sierp-det Recently, I turned my Sierpinski Triangle activity into a google slides activity. I added some videos and an interactive fractal web page. I’d like to share this with my followers because I think that you will find it interesting and engaging for your students.
Young students can explore the Sierpinski triangle as well. Any math class that discusses triangles or patterns, could enjoy this activity. Change the google slides to fit your needs.

There’s more than one pattern that can be explored. In the pictures above, you could count shaded triangles each time to get, 1, 3, 9, 27, 81…  or count the unshaded triangles to get 0, 1, 4, 13, 40… which is increasing each time by 1, then 3, then 9 and so forth which is related to the first pattern. You can discuss area and perimeter of the inside triangles and see what patterns may occur! Mind Boggling! 

Another fun activity involving Sierpinski’s triangle is to build a 3-dimensional one. If you have a die cut machine at your school with a triangle pattern, you can make enough for each student in your classroom and get them to connect them in such a way to produce the pattern over and over and make it larger and larger. Google: Sierpinski’s Triangle in 3-D and look at the images. It’s very cool!

Are you ready to receive my Sierpinski’s Triangle Google Slides Activity? Click here and make a copy! Enjoy and please consider following my blog as well as my TpT store so you can continue to receive math activities similar to this one.


Posted on — Leave a comment

5 Reasons Why You Need To Use Google Forms for Quizzes in Your Classroom

I don’t know what I would do without google forms! I have 150+ students this year and I’m teaching three different subjects. Google form quizzes have saved me! I recently made a google form quiz template that I will share with you at the end of this blog. Here are the reasons I love google forms for quizzes:

  1. TIME SAVER – Yes, you have to spend time making the quiz upfront, but the time you save on not grading the quiz is so worth it. I love that the quiz grades itself. You can even send students their results by email. You can share a copy of the quiz with other teachers. They can take the copy you give them and edit the quiz to work for their classroom. It would be great to alternate with a fellow teacher on making the quizzes. Again…big time saver! Once you have made your quiz, it automatically saves in your google drive. Now you have it for next year!
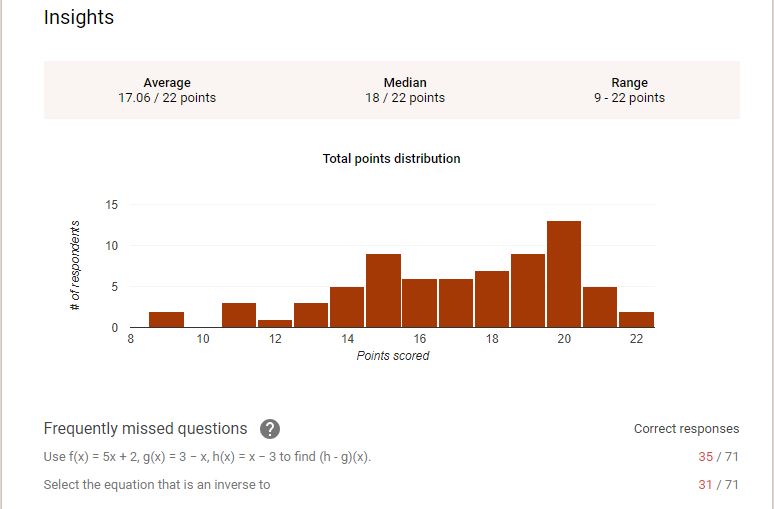
  2. ANALYTICS – When the students are finished taking the quiz, you can view the data! At the top of the google quiz, there is a tab for responses. In the response tab, you can view the summary, individual questions or individual students. You can’t get this from your paper assessments! Well, you can if you feel like spending a million hours figuring it all out! The data is very helpful! The picture below shows some data from one of my recent Algebra II tests. Take note of the most missed question! I love that I get to see what the students struggled with the most. This helps me with planning.goo2
  3. TEACHER ERROR – Do you ever make mistakes? I do! If you make a mistake on the quiz, just go fix it. If the students have already taken the quiz and you made a mistake and forgot to mark an answer in the answer key, then fix it. The google form will automatically make updates to the grades for each student. There are many times when my first period class will notice a grammatical error. I’ll fix it before the next class. It updates and saves automatically.
  4. GOOD FOR SUBS – When I know I’m going to be gone, I love to plan a quiz. No papers to copy, grades will be automatically generated and the sub really doesn’t have to do anything but keep an eye on the students! I hate being absent because it seems like it’s more work than it’s worth. Now I can take a mental health day and feel good about what the students have done while I’m gone.
  5. SIGN OF THE TIMES – We can’t hide from technology. I’ve been teaching for 32 years and I want to be up on what’s out there! Some teachers don’t want to mess with google forms because they feel like it will be too complicated. It is not complicated! Dive in! You can handle it. It just takes practice. I’m leaving you with a quiz template. Make it  your own. You will love it once you’ve become familiar with it.

*You will need a gmail account to create a google form.

Google Form Quiz Template

Visit my TpT store to find great resources like the ones below:

208a4-slide1Slide1