I’ve thought many times about writing about how I use Blogger for my classroom. With the coronavirus outbreak, it seems like a perfect time to do this. Like many of you, my district has called off classes for two weeks and who knows if it will go longer. I will still be able to give my students the things they need through Blogger. I’m really grateful that I started using this free platform.
I’ve been on spring break for a week. The week before spring break, we lost our school internet and the school website and all of the systems that we use. I’m in a huge district, so how could this happen? I still was able to use many of my tools because my campus has a second internet since we are connected to a college campus. I was still able to use my Blogspot! I started using Google Classroom at the beginning of the year to see what all of the fuss was about and I found it too restricting. I have too many things in my personal Google Drive and it was a pain to go back and forth between my personal Google Drive and the school Google Drive. I still love Google Forms and Google Slides etc., but I use them through Blogger which is a free blog publishing service by Google. If you have a gmail, then you have access to Blogger!
Here’s how to get to Blogger… Open a tab in Google Chrome. (You need to be signed in to your gmail.) In the top left part of the page you opened, you will see the waffle I highlighted. Click that waffle and you will see lots of stuff you can use. You may need to use the slide bar to find Blogger. Blogger has a funny looking B with an orange background. Click it! Follow the directions to set up the blog. The best thing to do if you are unsure of how to do the set up is to go watch a YouTube video. When I set mine up, I just fumbled my way through it. Don’t worry about a custom domain. You have to pay for domain names, so stick with the name that blogger has you create.
Go check out my Blogspot if you’d like an example. I’m giving you a chance to check it out so that you can use my ideas. It’s been recently updated, so it does not look exactly like the picture below. Here’s the link: https://mrshamitersclass.blogspot.com/.
Now that you have this platform, you just need to give your students the link. I teach 3 different subjects. I could have a Blogspot for each subject, but I thought it would be easiest to have just one. I usually like to give assignments in the sidebar using “pages” and make announcements to all classes on the main section of the blog which is called the “posts”. I’m not always consistent on that, but students know to look in both places. I also have started using a Google Calendar which is another way to attach lessons and/or quizzes and tests.
My purpose for giving my fellow math teachers access to my Blogspot is because I want to help. Even if you do not want to create your own Blogspot, then feel free to rummage through mine and find things you need. Also, I will be posting lessons for my students starting tomorrow.
While I’m at it, I have a free item to give you. A perfect tool during this time of distance learning is Boom Learning. Click here to get my free Domain and Range Practice Boom Cards. If you’ve never used Boom Cards, you can add a new platform to your list of online tools! You will not regret it. They are easy to use and self-checking.
We will all get through this crazy time. Teachers are the toughest people I know. Be strong for your students. They look to us, so we must remain in control and be good examples for our students. I wish you well and please let me know if I can help you any further.
It’s finally trig time! Yay! I love trig. Students tend to enjoy it too because it is so different from everything they have been taught so far. Over the years, I’ve tried different approaches to teaching trig. I know what kids struggle on and I finally feel like I’ve got a good way of teaching it. I see my trig unit broken into these parts:
Intro to Trig
Practice Finding Opposite, Hypotenuse and Adjacent
Setting Up Problems and Solving Them
Practice
Review
Assessment
More Assessment
Trig can be simple but to some students it can be complicated. They actually love it once they get the hang of it and how fun is it to use the calculator this much?! (When I first learned trig, we used charts to find the answers. We did not have calculators that would do the calculations. Yes, I’m old!)
When I created this unit, I knew what the two main issues were with teaching trig: 1) Teaching them which trig function to use 2) Teaching them how to solve the different types of problems
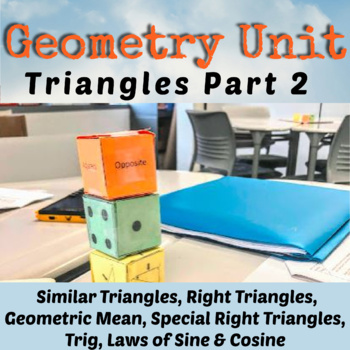
I decided to work backwards a little. In my introduction, I just tell them (As Bill and Ted would say) we are about to embark on an excellent adventurecalled Trig. I introduce a right triangle and tell them to visualize that they are in a right triangular room. They are sitting in one of the corners (not the right angle). I go on to talk about where opposite is and how when you are sitting in the corner, you can touch the hypotenuse and adjacent sides at the same time, but you can’t reach the opposite side. There are some notes we take and then we play a dice game.
For the dice game, I usually get my first class to cut out and put together the dice. Now I have the dice for the rest of the day. I put students into groups of 3 or 4 and they are competing against the rest of the class. There are three dice. One with triangles, one with dots and one with the words, hypotenuse, opposite and adjacent. Click the link below to watch the dice game which practices knowing the different sides with respect to a certain angle. Dice Game Short Video.
Before going any further, I teach kids SOH CAH TOA and we do some practice on finding those ratios. That part is normal progression, but here is the part that might seem a little backwards:I teach them how to solve trig equations next! The students do not know how to set them up yet, but I have figured out that if I go ahead and teach them how to solve the equations, then once they start setting them up, solving is a breeze. I teach them how to solve these three types of problems:
Looking for an angle
Looking for a side and the x is in the numerator
Looking for a side and the x is in the denominator
By the way, when teaching them how to solve these problem, get them to completely solve for x before typing anything into the calculator. Don’t let them find the sin of an angle, then multiply by the side. Let them type the whole thing in: 12 sin(36). I like this method because then the students aren’t rounding answers until the end of the problem. You can see that I did that in the examples above in problems 5 & 6.
Next is the PowerPoint. In the picture to the right, you can see one of the slides in the PowerPoint. Only the triangle with the sun, and the two arrows appear and students have to name which trig function is being referenced. I don’t use degrees for a while, I’ll just use symbols. I don’t want the variables and numbers to get in the way. Toward the end of the PowerPoint, the students are asked to set up the problems and then at the end, they go back to solve them.
Now it’s time to practice. I have 3 worksheets that help students find missing sides and angles. The first one places only an x on one side, a number on a side and gives one angle. This makes it easy to determine the trig function and it is like the PowerPoint. The next worksheet gives the students two sides and asks them to find the missing angle. The last worksheet is the toughest because now the students have to find x, y and z… two sides and an angle. This is much more difficult because it will not be obvious from the start which trig function to use. Students need to see that they actually have a choice sometimes and they need to decide where to start and ignore the extra info. I also throw in some special right triangles and an right triangle altitude problem to see if they remember those rules. The PowerPoint from earlier brings up that there might be more than one way to solve a problem, so hopefully when they get to the worksheet, they will use a quick special right triangle rule instead of trig, but if they can find the answer either way, I’m happy.
I have another resource that is not in this trig unit that I do at this point. It’s the Trig Maze. The students really get into it and work at it. It’s cool to work a problem and then see your answer on the paper (they are thinking, “YAY, I did it right!”) and it’s even cooler that it leads you to the next problem you are supposed to work. The maze comes with an answer document, so you can see all of their work!
Finally, I like to do some task cards with some real-life situations. Some of the task cards contain a ladder against a building, finding a flagpole height, finding the diagonal in a rectangle etc. There are 12 of these problems.
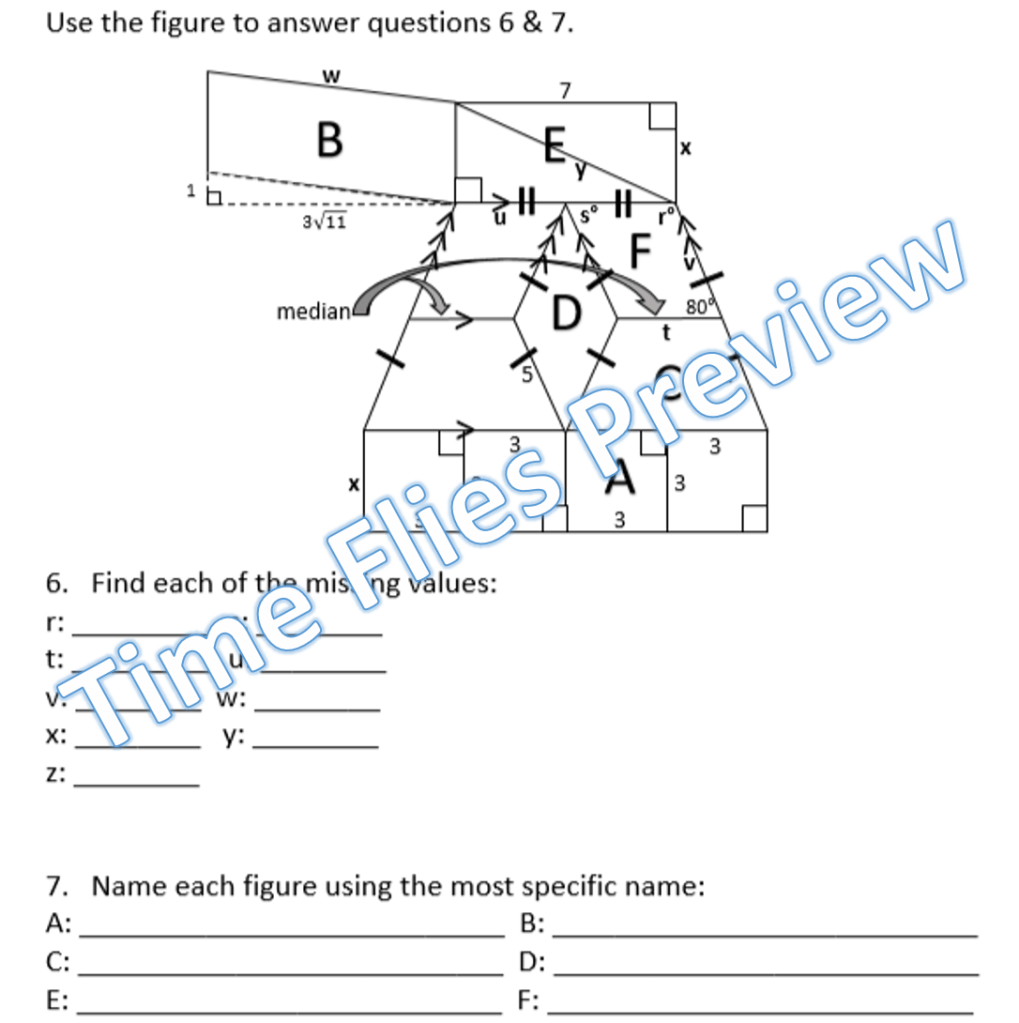
I end the unit with what I call the “Poodle Problem”. It is a group of 5 triangles that have been put together to look like a poodle. Go back and look at the very first picture at the top of this blog. That’s the Poodle Problem! The students find all the answers, then total them for one final answer. How fast is this to grade? Super fast! It’s a great quiz and a great end to the unit.
I’m not finished yet! Now I like to test all of the right triangle content. I have a test that I call the Right Triangle Test that has 10 questions with the following problems:
One Pythagorean Theorem Problem where they have to find the perimeter of the triangle.
One Right Triangle Altitude Problem where they have to find the perimeter of the triangle.
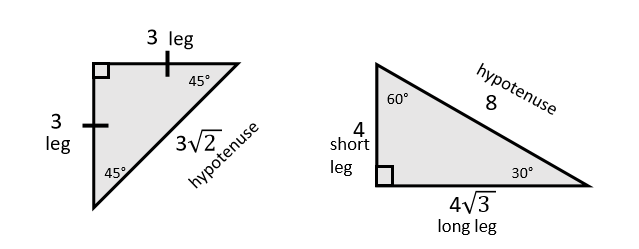
One 30-60-90 Problem where they have to find the area of the triangle.
One 45-45-90 Problem – easy, they just find the hypotenuse
Six Trig Problems – Just find a missing side, except for one problem is like the task cards, but a little tougher.
I had problems with cheating one year, so I went crazy and made 5 versions of the same test. You even have a choice of an answer bank or no answer bank. One of the 5 tests is a shortened version that I’ve used as a retest or a modified test. (It gives the students a little help on setting up some of the problems too.) I don’t like to give long tests. Students get enough testing. I like tests that are short and to the point. As long as I can tell they “get it”, why does it have to be super long?
I’m very happy with this unit. The only thing that it doesn’t contain right now is angle of elevation and depression problems. I’ll try to add this to the unit this summer. These problems were a big deal at one time, but it seems like we’ve gotten away from them in Geometry. I still think it’s good for students to see them.
Trig is fun and different and essential to future math classes. Below is all of my right triangle lessons including the Trig resource I’ve been talking about. What’s next on my agenda after right triangle trig? Law of Sines and Cosines of course! Law of Sines and Cosines is sold separately in my store, but it is also a part of Unit 7 below.
I cannot believe that the 4th grading period has come and gone already. Where does the time go? I’ve concentrated on solving systems, exponent rules and geometric sequences. We have just started the beginning of growth and decay for exponential functions. I feel like I’ve done a lot, but I was talking to a teacher today from another district that said that they are almost finished with the curriculum and they will have about 5 or six weeks to review for the STAAR test. I’ve still got to wrap up exponentials, foil, factor and get through quadratics in the 5th six weeks before I’m ready to start reviewing.
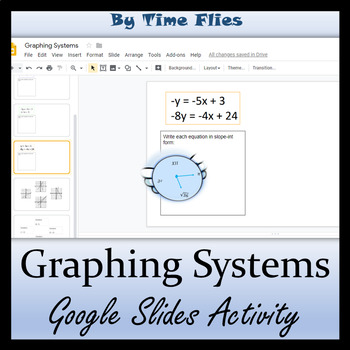
Here are some specifics about what I’ve done this grading period! Let’s start with systems. One thing about solving systems is that if you are behind in your curriculum, this is where you can catch up. You can hold off teaching your students the substitution method and the elimination method until after the test and just make sure they know how to set up systems and that they know how to solve systems on a graph or using linSolve on the nSpire calculator. I did not show them linSolve yet. I showed them how to find the intersection on the graph, but it gets complicated if students need to solve for y or if the graph’s window needs to be altered. LinSolve is a life saver and I’ll show my students how to use it before the test. I have a quick google slides activity that I like to use after I teach students how to graph systems. It also helps me to know which students are still struggling with solving for y. I have three free videos too on solving systems using various methods. These are perfect for a flipped classroom or just extra practice. The video on graphing would be great to show before doing the google slides activity! By the way, be sure to check out the new TEA calculator rules as of 2/13/2020.
I love exponent activities and I have created quite a few for my students to use. I’ve also experimented with different ways to get the students to understand the rules. The STAAR test usually has several exponent problems. I’ve seen some complicated multi-step problems. I try to get my students to understand how to find equivalent answers. I want them to know there is more than one way to write 5x^-2. I do a lot of practice with negative exponents and I work hard on the exponent of zero. I talk about how exponents are kind of like 9th graders, they don’t follow the rule of the problem. They are rebels and follow their own rules. I’ve tried PowerMan too. PowerMan is a fun way to get the students to write down the rules. See below:
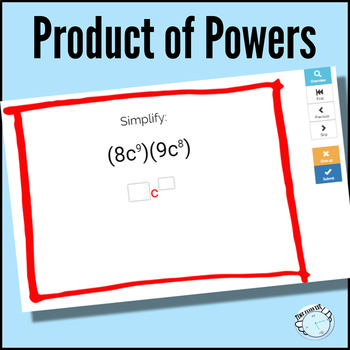
The PowerMan Explanation is at the end of my Properties of Exponents Activity in my store. I tend not to use it as the introductory method of learning exponents. Instead, I wait until I’ve taught the rules and then I’ll say, “Now, here’s how you can remember all these rules.” I get bored with worksheets, so I’ve also got a few digital exponent products. One is a google slides activity and another is just for the product property only and it is a Boom Card activity. I have a Time Flies Boom Learning Store too. If you have never heard of Boom Learning, it is worth your time to check it out!
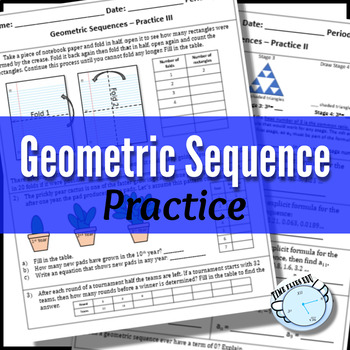
Before I really get into exponential functions, I like to introduce geometric sequences. This leads perfectly into exponentials. Students like patterns and even though the formulas are not exactly student-friendly, they usually figure out what the explicit and recursive formulas are all about. I like to do some hands-on activities too. This is my lesson that I use. It take the students through all the terminology. This is all they really need to know to be successful on the STAAR. (Which by the way, really isn’t what I’m all about, but it is part of my job to make sure they pass the test!)
My students took a benchmark created by our district this grading period. I noticed that the person that created the benchmark, took the 2019 May test and basically wrote a similar version. The first problem was a slope question and the second problem was a range question for a quadratic just like the 2019 test. I’m kind of glad they did this because I’m going to go over the benchmark and then I can use the 2019 test questions to see if the students understand their mistakes from the benchmark. If your district does not have your students take a benchmark, then I would suggest using the 2018 test as a benchmark. Divide the test up into several days and let the students take it. You can get the students to help you grade it. The TEA website has all the tests and answer keys here.
Out of 28 students, I had 20 pass the test with a 21 or better raw score. There were no surprises there. I had one person, only get 14 correct which is disturbing. She has struggled all year, but I didn’t think she was one of my lower students. I gave the students their benchmarks back this past Friday. I’m having them make corrections on the problems that have been taught in class that they missed. At the point of when they took the test, we had not learned about exponents and quadratics, so all of those questions are not important right now. The way we are correcting the test is I’m having them make three columns on a piece of paper. The first column is the problem number. The second column is their original answer. The last column is for their new answer with an explanation or work shown. I plan on looking at these very closely and working one-on-one with students that are not sure of how to work through some of the problems. I told them it was ok to say, “IDK”. I usually hate them writing this as an answer, but I really do want to know if they are clueless. I have not shown them one single calculator trick so far (nsolve). I hate showing them how to work problems without really knowing what they are doing, but there will come a point when I’ll bite the bullet and explain some of those tricks.
I’ve started a tutoring time during my advisory (homeroom) on Tuesdays. I started this before the benchmark but now I need to reevaluate the students that I have in there. Most will not change, but I have one I can take out and put a different student in his place. They are working in a program provided by our district. I’m not entirely sold on the program. I feel like I’m useless because I’m just making sure they are working in the program. These kids need more than this, I think. They have gaps and I doubt they are getting what they need from the program, but I’m going to continue to use it and give it a chance.
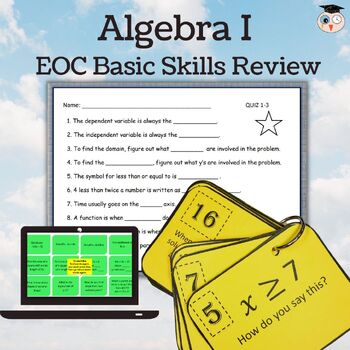
So there you have it. The fourth six weeks is done! My new plan is to focus on finishing the curriculum and focusing on the students with the most issues. I have my own review material that I will be starting. One thing that will be happening soon is I will have my students make some flashcards. I will have them start working through the flashcards and then we will begin taking quizzes over them. I make the students take the quizzes until they make at least an 80 or better. Originally the flash cards were meant to be task cards. You can find the cards and the quizzes in the resource below. I’ve also attached my STAAR Review Bundle. Good luck and hang in there! Our students will succeed!
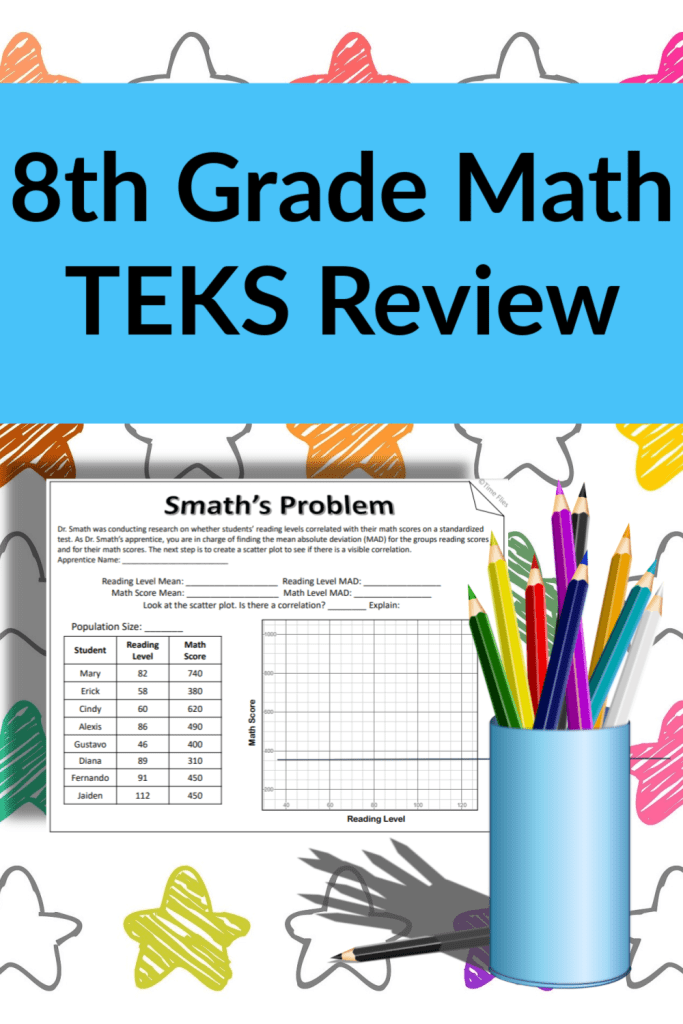
Teachers have enough to do without having to create their own review material. I decided to help 8th grade math teachers by creating a math STAAR review. Below I will explain a little about what you will find in each resource. At the end of each lesson, there is a review problem that I named, Smath’s Problem. It is a combination problem that reviews all of the content in the objective. A strategy could be that if you feel like your students understand a certain objective, then give them Smath’s Problem to see where they stand. A second idea is to go over all the TEKS in the objective lesson, then give Smath’s problem as a quiz.
If you are from Texas, then you know that the objective 1 standards are the process standards. These explain how the students will engage in the content. The tested objectives actually start with objective 2. Below is a quick explanation of the content covered with a piece of one of the reviews that I made. Every TEK is covered in the reviews and is written at the top of the worksheet.
TEKS Objective 2: Sets and subsets of numbers, approximating irrational numbers, scientific notation and ordering real numbers.
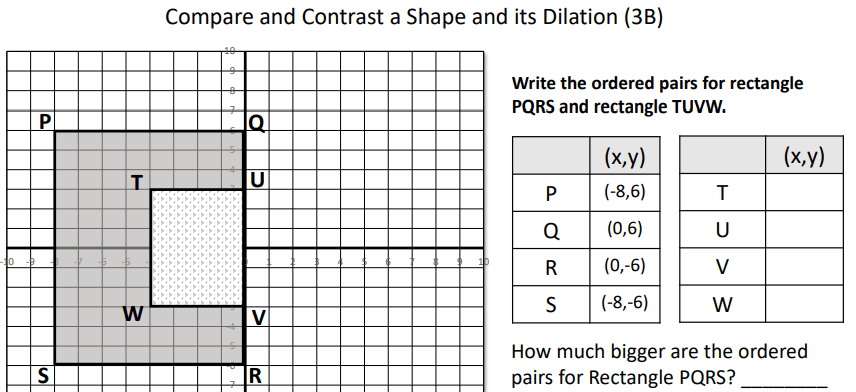
TEKS Objective 3: Setting up proportions, comparing a shape and its dilation, using algebraic representation to show a dilation.
TEKS Objective 4: Using similar right triangles to develop an understanding of slope, interpreting unit rate as slope in proportional relationships, determining rate of change, slope or y-intercept for a table or graph.
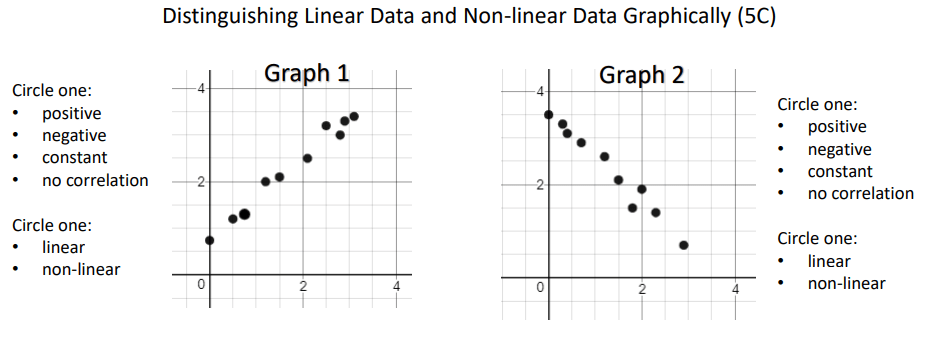
TEKS Objective 5: Multiple-reps, proportional and non-proportional linear relationships, scatter plots and predictions, direct variation, content literacy, functions and non-functions.
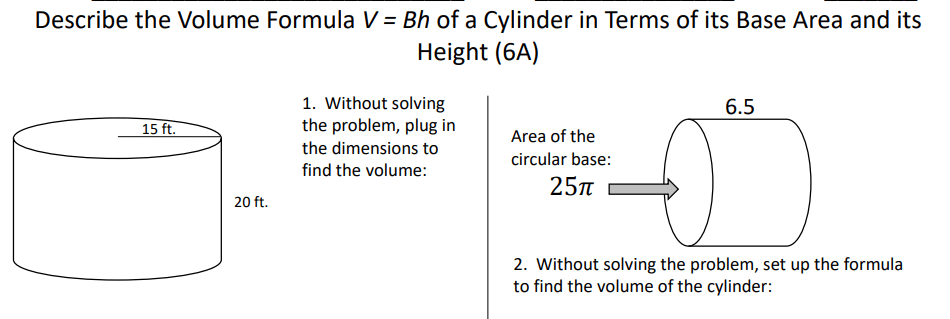
TEKS Objective 6: Plugging into the volume of a cylinder without solving, comparing the volume of a cylinder and a cone, using models to demonstrate Pythagorean Theorem.
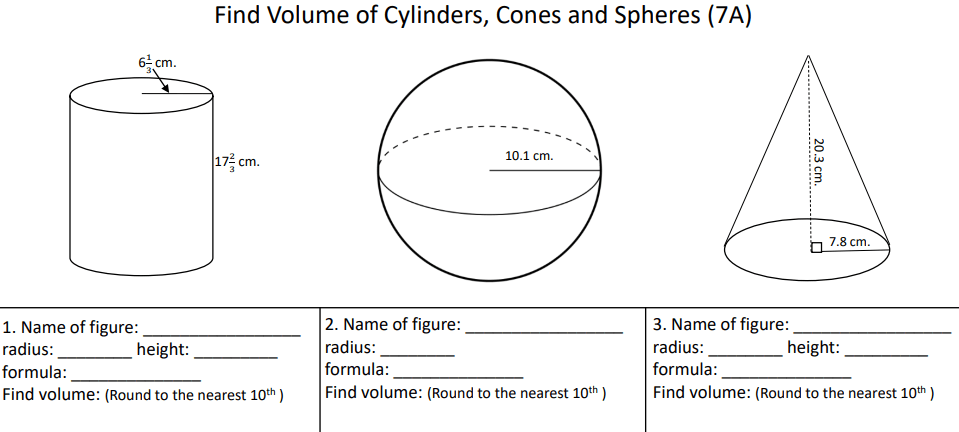
TEKS Objective 7: Volume of cylinders, cones and spheres, lateral and total surface area of rectangular prisms, triangular prisms and cylinders, Pythagorean Theorem and its converse, finding distance using Pythagorean Theorem.
TEKS Objective 8: Setting up and solving equations/inequalities with variables on both sides, writing a real-life scenario from a given equation, establishing facts about these geometry concepts: parallel lines cut by a transversal, angle sum and exterior angle theorems of triangles and AA similarity problems.
TEKS Objective 9: Lead up to Systems.
TEKS Objective 10: Understanding of transformations, study of which transformations preserve congruence, writing algebraic representations for transformations, effect on linear and area measurements when shapes are dilated.
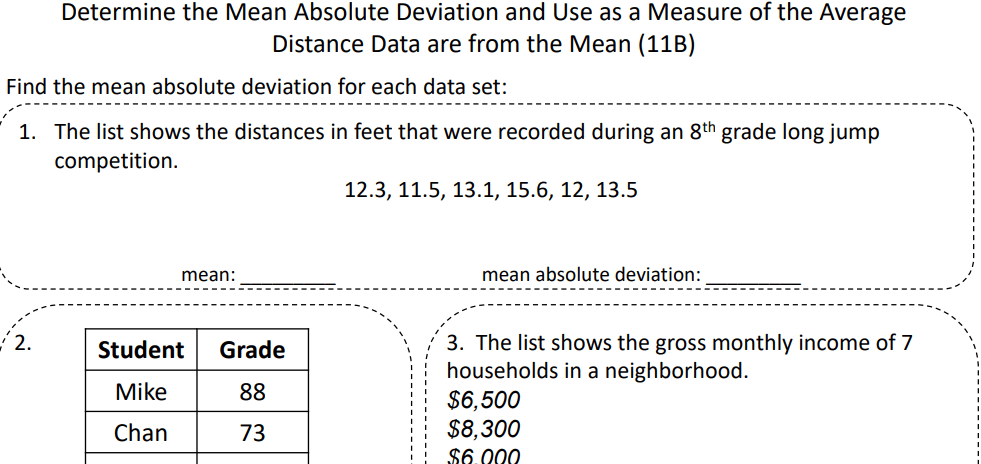
TEKS Objective 11: Determining if a scatterplot has an association, mean absolute deviation, random sampling questions.
TEKS Objective 12: Simple interest and compound interest, analyzing the effects of interest rate and loan length, analyzing how money grows over time, making financially responsible decisions, advantages and disadvantages of different payment methods, estimating the cost of college.
Each objective lesson is sold separately or you can purchase the bundle. Good luck!
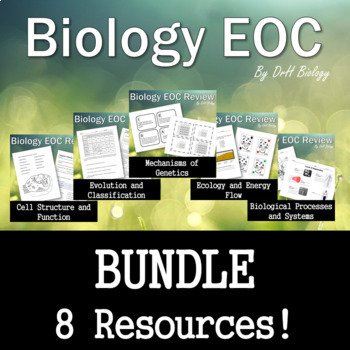
My husband and I teach state-tested subjects in Texas and we have both created reviews. The following blogpost is from my husband who is a Biology teacher:
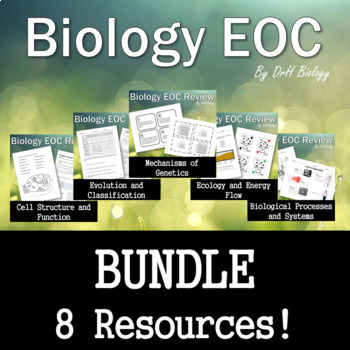
How do you get ready for your state exams? This is not an easy task and do you really want to create all your own material? I asked myself this same question a few years ago. The thing is, I was the only Biology teacher on my campus, so I did not have much of a choice. I knew that I didn’t want to create a massive resource that I couldn’t use, so I decide to break it into the 5 Reporting Categories that the state of Texas uses to organize the material. This seemed much more manageable than thinking about individual TEKS. I looked at the released tests and noticed many questions that kept reappearing and what the readiness standards were. Even when the TEKS slightly changed a few years ago, there were no major changes needed in my review. I’m proud to say, that I’ve used my reviews going on 5 years now and other than a few minor tweaks here and there, it is still a great review and relevant now more than ever. Please take the time to look at each category and see if any of this is something that you can use. All 5 categories are sold in a bundle, but each individual category is sold on it’s own as well. If you are struggling to know what to use to help you students, I think you will find this material very helpful. My advice is that you reflect on your data and decide where you need to spend most of your time and start planning now. Do you like to spiral information throughout the year? Do you need to do whole class reviews or individual reviews through tutorials? Are you planning a camp? Get a picture of where you should put your efforts, then it’s time to decide the resources you will want to use.
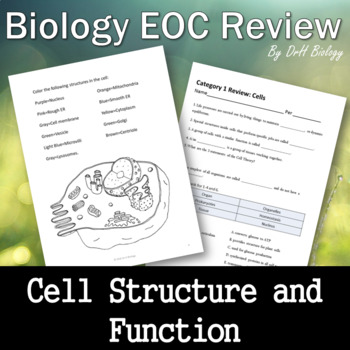
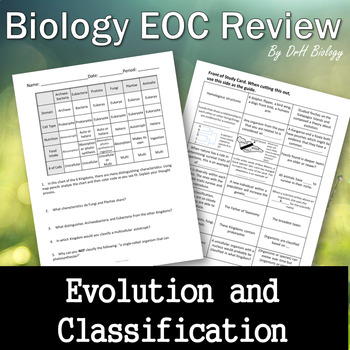
Category 1: This is a Biology review for Category 1: Cell Structure and Function. It is aligned with standards for the Texas EOC, but can be used for any science class as a review for cells and cell processes. The critical thinking worksheet supports critical thinking with 2 versions- one with a word bank, one without. This is a good collaborative piece, partner work or individual assessment. Students enjoy coloring so, why not learn about organelles while doing it? While using manipulatives, students can demonstrate knowledge of similarities/differences of the two cell types (pro- and eukaryotes) by categorizing cell characteristics using cards.
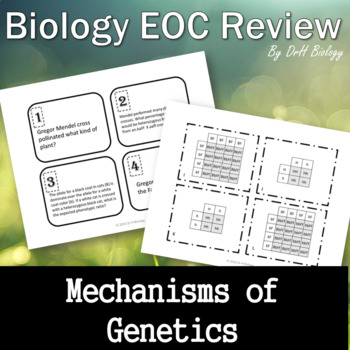
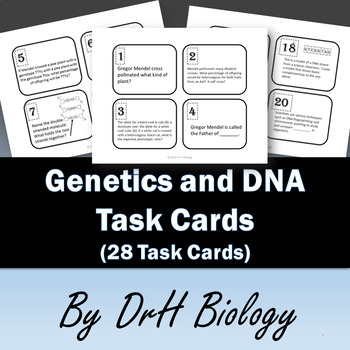
Category 2: Students typically struggle with genetic inheritance and anything DNA. This package focuses on essential vocabulary and working Punnett squares. Help your students become proficient with the language of genetics and protein synthesis! Below is is one of the pages of task cards that is available in this review.
Category 3: This item will help students become familiar with the hierarchy of classification. Students critically think about how to color the Kingdom chart based on characteristics. Next, they classify themselves and for this activity, I have them choose one additional organism for each taxon that is shared with humans. Dear King Phillip Came Over For Good Soup!
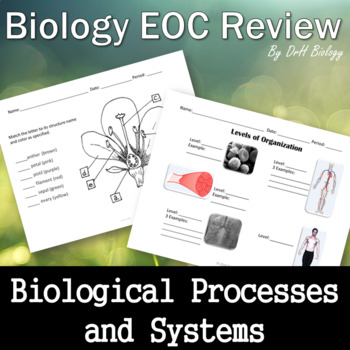
Category 4: This set allows students to describe the interactions among systems focusing on regulation, nutrient absorption, reproduction and defense from injury/illness. Maintenance of homeostasis is featured as well as intensive investigation of the relationship between products and reactants of cellular respiration and photosynthesis.
Category 5: Ecology and energy flow review focuses on species interactions with each other and the ecosystem. The War Card Set will take on a life of its own. Most students know how to play war with cards but I noticed some groups would play an adaptation to Uno or they would make up their own game. Definitely make at least 4 sets and watch the creativity bloom!
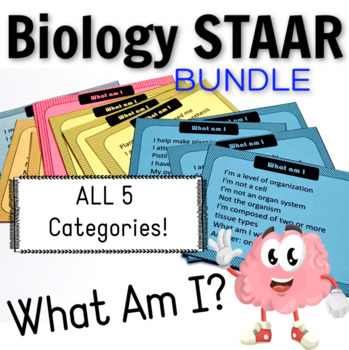
I’ve added a new resource this year that I am excited to use. This idea came to me from playing a game at my daughter’s house. This activity breaks the monotony of worksheets and is competitive. Again, I broke it down by categories and I sell it as a bundle as well as individual categories. Your students will play a guessing game called “What am I?” Each student will get a chance to read the card where other students are guessing what the mystery word is. There are a total of 64 cards in the bundle. Copy, cut and go! Below, you will see a sample card:
Good luck this year and every year with testing season. It is exhausting, but you will get through it! Please let us hear from you if you have any questions about any of the resources. If you have other biology classroom needs, my store is Dr.H Biology. Click Here TO FOLLOW MY STORE so that you can learn when I upload new resources.
Teachers know the importance of incorporating science, technology, engineering and math. In today’s world, students need a set of skills for future jobs that we can’t even imagine, so we must give them a variety of experiences. My husband and I have several activities that we believe qualify as STEM activities. Our thought process is that any time you can get students to do math in a real-life situation, you are headed in the right direction. Throw in some collaboration and problem solving and you’ve got yourself an even better experience. Remember, technology does not always have to be digital. Any use of a tool could be technology, such as using tape measures or any measuring device. Technology can be as simple as collecting data. The activities that we have below are excellent and will provide your students with some valuable thinking and exploration.
Vitruvian Man
Vitruvius asserted that every structure must be strong, useful and beautiful. This assertion was one of many in his writings. He also made claims about the proportions of the human body. Leonardo Da Vinci’s famous Vitruvian Man was an attempt to take what Vitruvius claimed and capture it in a geometric drawing. This measurement lab gives the students a chance to learn some history, collect data, through measurement, set up some mathematical problems, collaborate and analyze. The students go through 6 stations to find the measurements they need, then it’s time to test the ratios to see if they prove or disprove Vitruvius. You’ll love the accountable talk and the thinking that takes place in this very interactive lab.
The Quadratic STEM Activity
This is a self-paced project where students learn how to take information and plug it into an excel sheet then produce a graph of the data. I like to use it as a project grade that will replace the lowest test grade during my quadratic unit, but this does not have to be used in math classes only. This activity has a health aspect and can be used in science, health classes or even a medical class. Students create data tables for male and female blood pressures and then they are asked to take their own blood pressure to see if the data seems accurate. The school nurse will usually take blood pressure if you ask him/her or they can get it done at the machine at their local drug store. The final part of the activity is to write a short report on the findings. Below you will see part of a page that is explaining how to get started in the excel sheet:
My advice to the teacher before assigning this project is to go through the excel sheet yourself first, so that you can answer any questions from the students. As a math teacher, I love showing students how to use excel to create a table. This can come in handy any time they want to take a data table and create a graph. This skill could come in handy when writing future reports in any class such as science or social studies.
Nutrition Label Project
Dr. H developed this project because in the past the Texas Biology EOC would contain an analysis question using a nutrition label. This project is based on information found in nutrition labels but it has the students using many scientific processing skills. They must interpret and compare quantitative data using nutrition labels from cereals that they have chosen to analyze and investigate. Some parts of the assignment requires drawing inferences from the data and constructing comparative graphs to visually communicate information they have gathered. The final step of the project allows them to analyze and interpret the data into a written article explaining and defending their conclusions. As the students move through the assignments, you will notice the project becomes something they take ownership of and will have discussions with other students about their results. (HELLO CRITICAL THINKING!) They develop an understanding of that label on their food which they had never thought about before. Students will begin bringing you food labels and discussing ingredients or questioning if this food is good for them. The project is broken up into 4 parts that get increasingly complex and it builds confidence for many of your students. Dr. H says, “I assign this in the spring and, every year, I will get surprising work from a few students that kind of underachieved all year.”
Exponential Functions in Google Slides
This is a fun activity where students get to choose an exponential function situation and then work through the process of building a data table, graphing the situation, creating an equation and finally answering a question or two. The cool part is that your whole class is working in a google sheet all at the same time. I created this activity out of necessity one year when I was out of town. The students did the activity while I watched and helped them from my daughters house 2000 miles away. This activity is best for your Algebra 2 students. They need to have an understanding of exponential functions in order to be successful. An extension to this activity would be to allow your students to create their own exponential function activity. You would be amazed at what they can come up with!
I hope you are excited about these STEM activities. They are so much more fun and useful than the standard worksheet. It’s our job as teachers to answer the dreaded question, “When are we ever gonna use this in the real world?” I believe STEM activities are so important and will make you and your students feel satisfied about the work taking place in class.
Creating resources is a family affair at my house. My husband is a biology teacher and has been creating his own resources for a while now. For the past 7 years, he has been the lone biology teacher at his campus, so out of necessity he has to create most of his curriculum. He has decided to bundle all of his labs, activities and assessments into one bundle. So far this supplemental bundle contains 47 resources! The best part about his resources is that he uses every single one of them, so they are classroom tested. One thing that is amazing about selling resources on Teachers Pay Teachers is the ability to improve and add to your resources and this is a constant practice that both my husband and I believe is important. My husband’s description of this bundle is below:
This bundle contains resources I’ve created out of necessity over the years. It has always been my goal to make things fun/interesting but still contain the necessary learning objectives. When I create a resource, I ask myself “If I were a student, would I want to do this?” I also enjoy watching my students doing the assignments. Actually, they have helped in the development of each resource by finding mistakes, letting me know if something is unclear or confusing and, just if they enjoyed doing it. There have been many times an English or Math teacher has come to me and said “When your kids come to my class they are still talking about what they did in Biology!” Me: Yesss!
The 47 resources in this bundle can be broken in 4 categories. Out beside each one, I’ve listed how many of those types of resources are in the bundle.
Labs (8)
Assessments (9)
Units (2)
Lesson/Activities (28)
Lab Spotlight
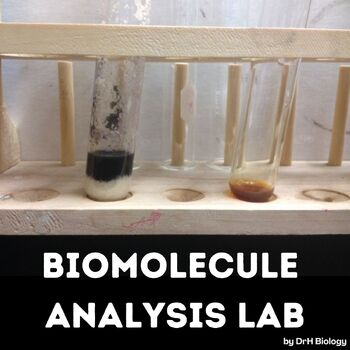
The biomolecules analysis lab probably has been through the most research and development in my classroom. It was given the name “Goop Lab” by students at some point. While it requires considerable prep and materials, the students get a real understanding of which foods contain which nutrients. It clears up misconceptions about food and creates a lot of discussion opportunities—especially when students compare their predictions to the actual results. If you are only interested in labs, I do have a lab bundle that contains my 8 lab resources or you can buy each individual lab in my store.
Assessments
These tests have all been written to follow the activities and labs included in this bundle. One of the most difficult concepts year after year is cell processes. Many students struggle learning things they cannot see. I’m thinking about the Cell Processes test over DNA, Mitosis and Protein Synthesis. I chose images for that test similar to what students will likely see on a state assessment. For a better understanding of cell processes, it is important they can tie the vocabulary to the image.
I’m not big on giving long tests or quizzes. Tests take up time and I like them to be concise and to the point. It is important to me to make sure they cover the objectives, but I never go overboard on giving long tests. Most of mine are 20 questions or less except for the semester exams. If you are only interested in a test bundle, see below (and all my tests are sold individually as well).
Units
I chose two topics to offer as an entire unit: Enzymes and Energy Transfer (cellular respiration + photosynthesis.) These objectives are heavily emphasized on state assessments and, of course, among the most difficult concepts for students to master. Again it is “cell processes” which is something a student cannot see but must understand. I have had good success in my urban-setting classes with each of these.
This unit contains presentations over photosynthesis and cellular respiration with presentation notes for the teacher. Students will be able to take notes from these presentations in their interactive notebooks. There are worksheets over both photosynthesis and cellular respiration. Matching cards are available for an extra activity to help clarify the information. This unit also contains a yeast lab and a 20-question assessment. Answer keys for all worksheets, matching cards and tests are included.
Activities/Lessons
Twenty-eight items is (conveniently) about the number of weeks you have in school that you are not interrupted by testing/field trips/other, etc… Kidding aside, these are all learning-objective-driven and have been developed over several years with much student input. Many of these are matching card activities that have been particularly successful. I keep matching cards out all year and I will routinely use them to fill the last 15-20 minutes of a class. The students will say “we’ve already done these!” Then I say “Okay, prove to me that you learned it!” Repetition is important to achieving mastery!
If you are a Texas teacher, the one thing not included in this supplemental bundle is all of my EOC review resources. These resources are very popular in my store. The most popular item is the bundle that contains reviews for all 5 categories plus has some bonus material. I’ve recently made a new item for reviewing the EOC’s that could be used in any biology classroom no matter where you teach. It came to me when I was playing a game with my family. I titled this activity, “What am I?” A student reads a clue while other students guess what the answer is. More clues are given until the students eventually get the answer. What a great way to review that’s fun and interactive.
Thanks for taking the time to check out all of this information. Teaching is a time consuming career. My hope is that I can save other teachers time and energy by providing them quality lessons and activities. I’d like to leave you with a freebie from my store as a thank you! Get your FREEBIE HERE: Genetics Practice Problem- Dihybrid Crosses
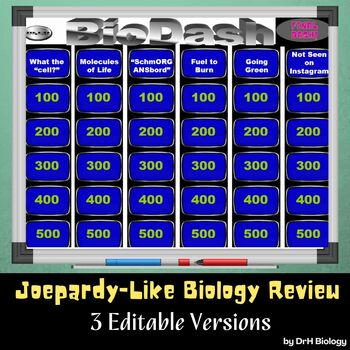
I’ve added a few more EOC resources since writing this post. You’ll see a Jeopardy-like Game and my Ultimate EOC Bundle which has several of the items mentioned above.
Quadrilaterals are a big topic in geometry. There are so many things to know that it tends to get confusing for students. Students have misconceptions from their middle school math classes that are hard to overcome such as that a square is a square and only a square. A square is no way, no how a RECTANGLE! OH My!
I created a quadrilateral unit where I begin with a card sort activity. The cards have different shapes on them and the students are asked to separate them into parallelograms, trapezoids and other major shapes. This year, I decided that they should have a “for sure” pile and also make a “not sure” pile. I love listening to the conversations. Below is a pic of some slides I show:
The next thing that I like to do is discuss the Venn Diagram for Quadrilaterals. For some students, this is a breeze but for others, they are totally confused on why I’m using ovals in a diagram to represent groups of quadrilaterals. It’s best to make sure your students remember what a Venn Diagram is. I like to give an example of a region with math students overlapping a region of biology students to show that the overlap means all students taking both math and biology. Look at the Venn Diagram below. Can you figure out what quadrilaterals go in each region? Can some go in more than one spot?
This unit is the best place to use always, sometimes and never questions and if the students understand the Venn Diagram, then the always, sometimes and never questions are pretty obvious. It’s also a good time to talk about what does opposite and consecutive mean? Many of the definitions and properties use this terminology, so I spend time helping them understand where opposite sides and angles are versus consecutive sides and angles.
I like to get the kite and trapezoid out of the way first, so I can spend most of my time on the parallelograms. Students are not familiar with the kite, so this is usually a brand new topic for them. They think they know what a kite is but usually they are getting a rhombus confused with a kite. Each time I present a new quadrilateral, I give the definition and then we try to find other things that are always true about the shape. This is cool, because you get to talk about the diagonals and how they create congruent triangles. I also try to put proofs into the lesson as much as possible.
During the trapezoid part of the lesson, there is a discussion on isosceles trapezoids, midsegments of triangles and medians of trapezoids. A good reminder at this time is how trapezoids are related to parallel lines cut by a transversal, so that they can understand that there are some same side interiors that will be supplementary. Again, there is so much information, that its hard to know when to stop. Trapezoids could be a two week lesson if you let it, but I keep it to two pages. After the trapezoid lesson and the kite lesson, I give the students some practice on finding various parts of the shapes.
The rest of this unit is spent on parallelograms. Each time that I get to a new shape, I call it a “Parallelogram Study” or “Rectangle Study” etc. I let the students work through the definitions, properties and proofs. The other aspect of this lesson is discussing the coverses of the definitions and properties. This helps the students realize that if you see a shape and you are not sure what it is, then what is the least information you need to decide it is a rectangle for example.
The lesson concludes with practice on the parallelograms. There is a page of work where some major algebra topics are practiced. For instance, there is a rectangle problem where the students have to set up and solve a system. There is a rhombus problem where the students have to solve a quadratic. There is a square where the students find the length of the diagonal using the variable “s” for a side. This problem is a lead up to 45-45-90 triangles. I usually have to help the students with this whole page, but I don’t mind. Since I’m an Algebra II teacher as well, I like my geometry students to see as much algebra as time allows.
There is a set of task cards that act as a review for the Quadrilateral Test at the end of the unit. The test is only two pages long, but it is pretty involved. There is a major problem where the students have to find quite a few things. The picture of the problem is seen below:
Finally, there is another quick assessment that I use as a retest. All answer keys are included. It usually takes me about two weeks to get through all the work plus a couple of extra days to review and take the test. I love this unit. The information is extensive and I love how it hits on previous geometry and algebra topics. If you are interested, please check it out in my store. Click the pic below to go see the Quadrilateral Unit. If you would like to read more about my geometry curriculum, I have a blog post that you can read here: Geometry Curriculum for the Year.
I promised that I would keep anyone interested up-to-date this year on my progress. I love doing this because I’m going to be able to look back and see where I want to improve after I get my results this year. Here’s my post on the first six weeks: First Six Weeks in Algebra I
I lumped the 2nd and 3rd 6 weeks together in one post because I have so many interruptions during this time. Every time I turn around there’s a field trip, a district benchmark, PSAT, TSI or other disruptions. My strategy has been to get through as much content as possible. I know my students very well at this point and I know who to keep an eye on.
The content that we’ve covered heavily is seen below:
So far I haven’t pulled many questions of old STAAR test. Their minds were blown when I was explaining the recursive formula in arithmetic sequences. I did look back into old STAAR test to see how often sequences have been tested. The only question I could find from the the past three years was this problem from the 2017 released test:
In general, arithmetic (and geometric) sequences are not a big part of the test. The 2019 test did not have any questions on the topic. This question below is from the 2018 test:
I suspect that they rotate questions from the TEKS and that next year there will be at least one question like #22 or #9 above.
I wanted to start some recycling of the first six weeks through practice sheets like I did last year but life happens and I did not start this. (Side note: I’ve been teaching for 33 years. I always make plans to do this or that, but I’ve learned that I cannot always get to everything. Please don’t beat yourself up if you do this too. A lot of things in education and the school environment cannot be controlled. Don’t worry if you have visions of grandeur but it doesn’t always work out.) One thing I do feel good about is that I do not let the students use a calculator every day. They have to do math in their head. They did a lot of solving for y and manipulating formulas so they did get a taste of some of the things from the first six weeks which was mostly solving equations. Another thing I feel ok about is I know that I’m about to do systems which will also be good for practicing solving equations. We will also hit inequalities again through systems, so recycling information is going to happen naturally!
While on the topic of systems, if you are behind in your curriculum, this is a good time to try to catch up. Systems are important, but you can save solving for systems for after the STAAR test. Teach them how to set them up and solve them on the calculator for now. I hate this, but at the same time you have to make sure you cover all the material. Save solving systems algebraically for later if you need to.
I promised myself that I would make sure and have students explain the math they were using more. I wanted to know if they really understood how to solve for y and graph equations, so I made a flipgrid question when we got to solving and graphing inequalities. The students really enjoyed it and it was an eye opener for me. Students have a hard time with the vocabulary and I could tell who was bluffing their way through explaining the process.
The second semester has started and now it’s crunch time. I have to be deliberate in everything we do. We are starting with graphing and writing linear systems and then on to exponent rules. Check back to see what happens next!
It took me a year and a half to complete my geometry curriculum, but I finally did it. I’m constantly updating and adding to it. I guess you could call it a living and growing curriculum. I’m using the curriculum myself, so I find things I want to update or make better all the time. I also take suggestions from teachers that are using the curriculum. Recently, I had a request to make all the quizzes and tests editable. With the changing times, it’s important to have multiple tests that cover the same topic so that you can limit cheating, differentiate or give make-up tests or re-tests. All tests and quizzes in the curriculum are indeed EDITABLE now!
On the main page of my Geometry Curriculum on TpT, you will see every resource in the curriculum. I also sell each one of these resources separately in my store. A third way that I have the curriculum broken down is by units which I also sell in my store. Here is the first unit in the curriculum:
Why did I feel the need to write this curriculum? Many of my students come to me after taking Geometry over the summer. In my district, students have the opportunity to get ahead in math. If the student does not pass Geometry during the summer, they end up using the exact same curriculum again. They get to keep their book from the summer with all of the work already done. It doesn’t make sense. Also, it was very easy for students to find the answers on the internet for the book we used. It was time to figure out something and stay ahead of them.
I really like a hands-on curriculum. I use patty paper, compasses, protractors, tape and scissors on a regular basis. I also like to give Google Form tests as well as activities on Google Slides and Boom Cards. The resource cover above shows one of my favorite conditional statement activities. As you can see, we do lots of cutting and pasting.
Many of the activities are discovery lessons. I make sure there is plenty of algebra involved to keep these skills alive for the next math class. If you have any specific questions about this Geometry Curriculum, please leave a comment below, or ask a question in my TpT store.
To read more about the units, I’m slowly but surely writing posts about them so teachers have a better understanding of what they contain.
My final unit in the curriculum has been uploaded. It is a unit on probability which is part of the curriculum in Texas.
I’ve also recently made all of the tests and quizzes editable. If you purchase the curriculum, you will find them in each lesson. If you’d rather purchase this resources separately, click here: Editable Geometry Assessments.
You can find me on Instagram @time_flies_math . I like to show student work in action on my Instagram posts. Check it out if you have time. It will help you get a feel for some of the lessons. To see the curriculum in my TpT store, click the picture below.
As you were looking at the curriculum, you might have noticed that it contains Boom Cards. If you do not want Boom Cards, then click the pic below to get the version without them.